Docker began introducing a new CLI command, docker init, allowing us to easily build stake-in-the-ground Dockerfile, docker-compose and .dockerignore files for a project. As the documentation says, these are “sensible files”. That is because init comes with templates to build these files based on your language.
docker init is a plug-in that, because it is a developer tool, is installed with Docker Desktop.
Early on, there were templates for HP, Python, Rust and other languages that I don’t code in. Finally the ASP.NET Core template arrived and it was time for me to start trying it out.
But I already had ways to create ASP.NET focused Dockerfiles and docker-compose files. The Visual Studio Code Docker extension allows you to add those to existing projects. Visual Studio can infer Dockerfile when you are creating a new project using a template or add that and compose after the fact.
Curious as to how these all differ, I explored the variations and will share those with you here. I will first do so with an ASP.NET Web API generated from a template and then open up an existing multi-project API that interacts with a database and see if that has any impact on the generated files.
JetBrains Rider also has Docker support but I did not include that in my already lengthy investigation. You can learn more about that support in their docs: https://www.jetbrains.com/help/rider/Docker_tools_for_net_projects.html#docker_support.
The solutions I created in this article are shared at https://github.com/julielerman/DockerInitComparison
Setting up Test 1: docker init with a dotnet new webapi
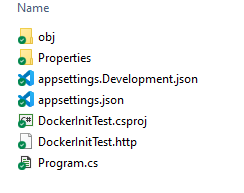
At the command line, in a new folder I’ve named dockerinittest, I’m just running dotnet new webapi.
This creates my little API, using the folder name as the default projet name.
Once that little bitty app is created, I then type in docker init. The command will gather a few bits of info and use what it has discovered in your folder to seed the responses which you can change.
- App platform
- Name of main project
- Version of .NET
- Local port which will default to 8080.
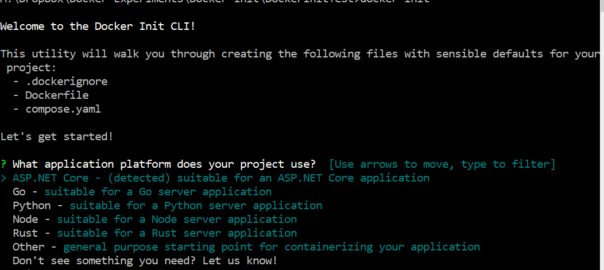
Here’s how that looks:
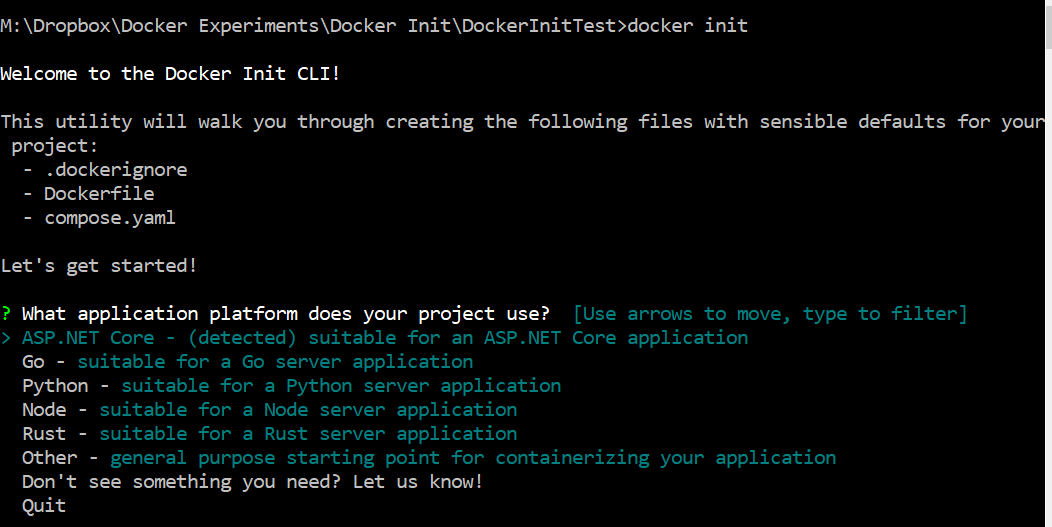
I love the “Don’t see something you need? Let us know!”. If you select that option, it will open up Google Form for you to share your ideas with dev team.
Notice that ASP.NET Core is already selected (notice the arrow to its left) because it was detected in the folder. So I just hit enter to get those sensible defaults created.
The tool then asks for the rest of the options with prompts based on my project:
? What application platform does your project use? ASP.NET Core
? What’s the name of your solution’s main project? DockerInitTest
? What version of .NET do you want to use? 8.0
After the final response, init then creates the sensible files (sorry, I just can’t resist) and provides a bit of guidance for running the API in Docker.
CREATED: .dockerignore
CREATED: Dockerfile
CREATED: compose.yaml
CREATED: README.Docker.md
✔ Your Docker files are ready!
Take a moment to review them and tailor them to your application.
When you’re ready, start your application by running: docker compose up –build
Your application will be available at http://localhost:8080
Consult README.Docker.md for more information about using the generated files.
Setting up Test 2: VS Code extension with a dotnet new webapi
For the second test, I have a new folder called VSCodeCreate. In there, I again use the dotnet cli to create a new web API project. Then I open that project in Visual Studio Code with “code .” at the command line which is the easy way in Windows.
I already have the Docker extension (created by Microsoft) installed in VS Code, so after opening the command palette with F1, I can choose “Docker: Add Docker files to workspace” . Like docker init, it presents me with some options.
- Application platform: In my case .NET: ASP.NET Core is on the top because it was my most recently used option and I select that again.
- Operating system: Windows or Linux. I choose Linux. I have no need for a Windows container.
- In fact, it helpful asks: “What port(s) does your app listen on? Enter a comma-separated list, or empty for no exposed port.” Today it is defaulting to 5063 and I choose that.
- Include optional Docker Compose file? I don’t really need this for the single project solution, but for the sake of comparison, I will say Yes.
That’s the end of the options and the extension creates a Dockerfile, a pair of compose files: docker-compose and docker-compose.debug, and a .dockerignore file. The debug file is really handy and it makes sense that VS Code can use that since it’s an IDE where you can debug your code. docker init , a command line tool, doesn’t have any guarantees that you’ll be debugging your code and therefore it didn’t really make sense for it to create such a file.
Setting up Test 3: Visual Studio with a new ASP.NET Web API
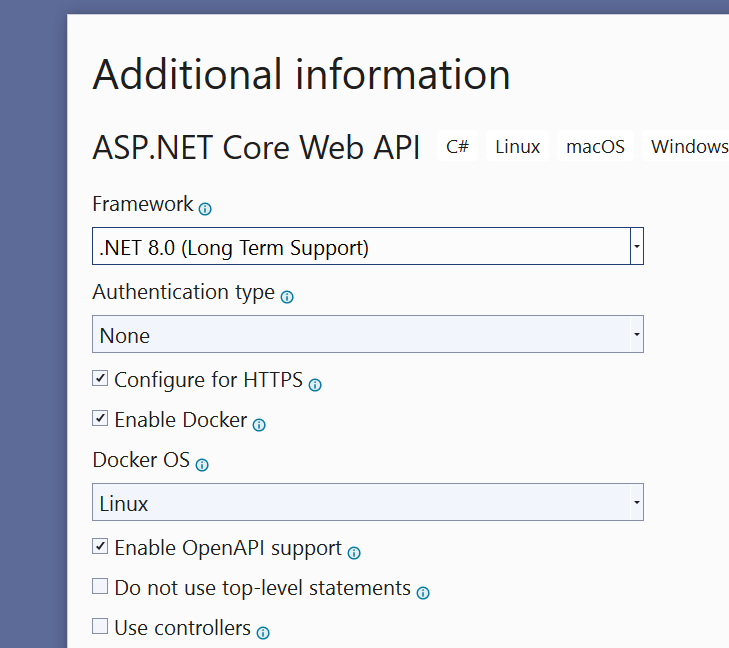
In Visual Studio, I use the ASP.NET Core Web API template to create a new project. The template’s wizard has prompts for enabling Docker and choosing which OS the container should be created for.
The Web API project is created with a Dockerfile and a .dockerignore file.
What about a docker-compose file? That gets added as a separate step. However, an interesting bug (https://github.com/MicrosoftDocs/visualstudio-docs/issues/9789) prevents me from adding it because my VSCreateFiles.sln file and VSCreateFiles.csproj are in the same folder! That’s what you get for creating demoware mindlessly.
I’ll restart and be sure to uncheck “place solution and project in same folder” in the wizard. I’m still letting it create the Dockerfile. With this, Container Orchestration support is an option. After specifying that it should target a Linux container, the compose assets are created.
That’s a comparison of the experience. Now let’s look at what gets created by each option.
A Handy Readme From docker init
docker init adds a Readme markdown file that provides some intro level guidance on running the app in the container, deploying the container, publishing the container and provides links to additional resources. Super helpful information.
Comparing the .dockerignore files
Next is the .dockerignore file. I’ve listed the contents of each in the table below. They all have the same core set of files which in fact is the entirety of what the VS Code extension has included. docker init has added one extra, .DS_Store which is short for Desktop Services Store, a file related to MacOS. I created this on Windows, but the docker init is generic so it’s covering its bases. Visual Studio added an Azure specific yaml file (in the middle) as well as some additional git files (listed at the end). The outliers are in red.
| Docker init dockerignore | VS Code extension | Visual Studio |
| **/.DS_Store **/.classpath **/.dockerignore **/.env **/.git **/.gitignore **/.project **/.settings **/.toolstarget **/.vs **/.vscode **/*.*proj.user **/*.dbmdl **/*.jfm**/bin **/charts **/docker-compose* **/compose* **/Dockerfile* **/node_modules **/npm-debug.log **/obj **/secrets.dev.yaml **/values.dev.yaml LICENSE README.md |
**/.classpath **/.dockerignore **/.env **/.git **/.gitignore **/.project **/.settings **/.toolstarget **/.vs **/.vscode **/*.*proj.user **/*.dbmdl **/*.jfm**/bin **/charts **/docker-compose* **/compose* **/Dockerfile* **/node_modules **/npm-debug.log **/obj **/secrets.dev.yaml **/values.dev.yaml LICENSE README.md |
**/.classpath **/.dockerignore **/.env **/.git **/.gitignore **/.project **/.settings **/.toolstarget **/.vs **/.vscode **/*.*proj.user **/*.dbmdl **/*.jfm **/azds.yaml **/bin **/charts **/docker-compose***/Dockerfile* **/node_modules **/npm-debug.log **/obj **/secrets.dev.yaml **/values.dev.yaml LICENSE README.md !**/.gitignore !.git/HEAD !.git/config !.git/packed-refs !.git/refs/heads/** |
Comparing the Dockerfiles
Now let’s look at the Dockerfiles created for each variation.
Via docker init
Like the readme file, the Dockerfile created by docker init is filled with instructional comments describing what each line of code is for. It also provides hints of common changes you might want to make and why and links to more information. Removing the comments, here is the actual code in the file.
target=/root/.nuget/packages \
dotnet publish -a ${TARGETARCH/amd64/x64}
–use-current-runtime—
self-contained false -o /app
FROM mcr.microsoft.com/dotnet/aspnet:8.0-alpine AS final
WORKDIR /app
USER $APP_UID
ENTRYPOINT [“dotnet”, “DockerInitTest.dll”]
This is doing a staged build of the image. Starting with a base of the dotnet SDK(first FROM), copying in the source and compiling the application (RUN).
Then it takes that compiled application and copies it into a smaller image that’s based on only the ASPNET core runtime (second FROM) as it no longer requires the larger SDK to build. With that image, it finally defines a user and entry point for when you build a container from this image.
Via VS Code Extension
Now let’s see what the Docker extension for VS Code built. Theres a lot more code here and no comments.
I remember being overwhelmed years ago the first time I saw what this extension created. But the ASPNET docs provide a detailed explanation, which I had to read through numerous times, and so my learning journey began.
This, too, creates a staged build named “build”. But while the previous Dockerfile built two stages, this one uses four. The first is that it’s creating an image (“base”) from the aspne core image and setting it aside. Then like above, it creates an image based on the SDK and pulls in the needed files. The steps here are more explicit about file names than the previous Dockerfile. Next it explicitly restores the Nuget packages, rather than just letting that happen during the build. If you look closely at the complex RUN command from the first Dockerfile, you’ll see that it is compressing these steps into that single command.
The third stage publishes the application into a new image (“publish”) from the SDK-based “build” image and publishes the file into a folder on this new image. Again, notice that publish is part of the RUN command from the docker init generated file.
Finally, we return to the set-aside “base” image and create our fourth and final image, named “final”, into which the published application files are copied. This is the image that containers will be built from and therefore defines the entry point.
One other point is that this Dockerfile specifies the port (5063) on which the app will be exposed by any container created from the image.
FROM mcr.microsoft.com/dotnet/aspnet:8.0 AS base
WORKDIR /app
EXPOSE 5063
ENV ASPNETCORE_URLS=http://+:5063
USER app
FROM –platform=$BUILDPLATFORM mcr.microsoft.com/dotnet/sdk:8.0
AS build
ARG configuration=Release
WORKDIR /src
COPY [“VSCodeTest.csproj”, “./”]
RUN dotnet restore “VSCodeTest.csproj”
COPY . .
WORKDIR “/src/.”
RUN dotnet build “VSCodeTest.csproj” -c $configuration -o /app/build
FROM build AS publish
ARG configuration=Release
RUN dotnet publish “VSCodeTest.csproj” -c $configuration -o /app/publish /p:UseAppHost=false
FROM base AS final
WORKDIR /app
COPY –from=publish /app/publish .
ENTRYPOINT [“dotnet”, “VSCodeTest.dll”]
Whew!
Via Visual Studio
Now for the Dockerfile created by Visual Studio as part of the ASP.NET Core project template. It is nearly the same as the one created by the VS Code extension. This isn’t a surprise to me as they are both defined by Microsoft and likely by teams that are collaborating. I won’t bother listing the entire thing.
The most significant difference is that it exposes two ports, 8080 and 8081, the latter to be used as the https target.
EXPOSE 8080
EXPOSE 8081
In the long run, the Visual Studio Code and VS generated Dockerfiles are clearer to read but achieve the same result as the docker init version which is minimal image that contains the app and is not bloated with the SDK. docker init does it in fewer passes. On my system, any differences between the resources used and time taken were not noticeable although I did not perform any serious benchmarking.
Comparing the Compose Files
This is where you’ll find the most significant differences between the three.
As a reminder, docker init and VS Code’s Docker extension create the docker compose file along with Dockerfile and VS requires you to explicitly create compose.
Consider the fact that in all three cases, I have only a single project and am not involving a database or other resources that might require additional images. In all three cases, compose isn’t really necessary as I have no need to orchestrate multiple images. docker run using the single image will work.
docker init’s compose
The docker init generated file is simply named compose.yml and its actual code is simple as well. It will create one container named services based on the image named final generated by Dockerfile. And it will expose the service on the host computer’s port 8080 and internally on the container’s port 8080.
But I referred to this as the “actual code”. That’s because the file is filled with comments that provide further guidance and links to documentation, especially helpful for those new to Docker. And it also provides a commented example of running a second container to supply a PostgreSQL database via the official postgres image. That is very handy because otherwise it’s off to google, or github.com/docker/awesome-compose or other existing projects to copy and paste the same. I also would like to say that with this project open in VS Code, I tested out GitHub Copilot in the yaml file.
Here is my prompt:
#create a service using Microsoft SQL server docker image
And here is what it generated, ignoring the fact that the server service already exists, but also very likely having read the code already in the file:
This made me very happy, knowing what I went through back in my early Docker days to comprehend and achieve the same.
The original example in the yaml file for postgres is more extensive and you can see it in my GitHub repo.
VS Code’s Compose
Now let’s take a look at what the VS Code extension created.
Recall that above I said that this created two files: docker-compose.yml and docker-compose-debug.yml.
The docker-compose.yml file does have one comment which I’ll include the full listing:
This is a bit more explicit than what docker init created. It specifies the version and names the container using the name of the project and image. Also, rather than specifying it should build form a particular image, it says to leverage the contents of the Dockerfile to learn what it needs. Finally, it exposes both ports on 5063 as per the Dockerfile specification.
Interestingly, the same GitHub Copilot prompt results in the following in this file:
This is missing some important details like the ACCEPT_EULA attribute and ports for the image.
I know this because I’m not relying on Copilot for 100% knowledge, but just to do some quick typing for me. Especially for the URL of the image! Who memorizes that stuff?
I cannot explain why it is so different from what it generated in the other project although someone with more expertise with Copilot might be able to.
The second compose file allows you to debug the code when it’s running in the container which is a glorious capability in VS Code. VS can do it, too. It uses the same image created from the Dockerfile but applies some additional parameters. It also uses a volume which, from my research, is where the source code remains accessible to the debugger. However, I could not see evidence of a volume in either the Docker Explorer in VS Code or in Docker Desktop. Again, brighter minds than mine might be able to explain.
Visual Studio’s Compose
Now let’s turn our attention to the compose file created in Visual Studio using the “Container Orchestration support” menu option.
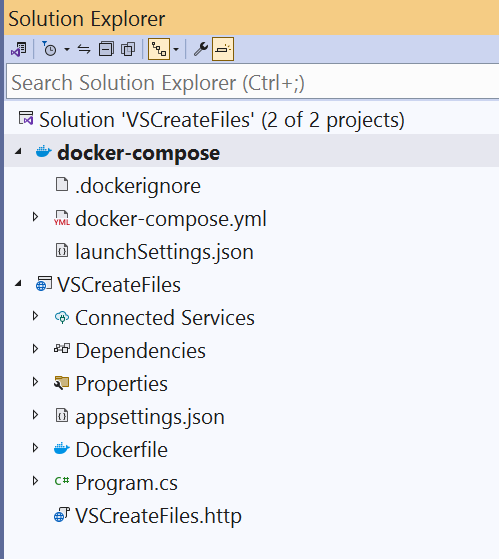
First of all, it’s important to know that the compose files are in the solution but not in the project which makes perfect sense. In the other scenarios, everything was contained in the single folder for the project. If you added more folders, it is up to you to move the compose files outside of the folders.
Here is how that looks in the Solution Explorer:
The heading is a special type of project file with a dcproj extension, whose contents describe the files included and various attributes about the container. It’s interesting and I recommend looking at it in the repository.
The compose file is a bit different than the one created by the VS Code extension:
- It does not specify ports.
- It will dynamically find the vscreatefiles image
- It knows that the Dockerfile is in a different folder.
version: ‘3.4’
services:
vscreatefiles:
image: ${DOCKER_REGISTRY-}vscreatefiles
build:
context: .
dockerfile: VSCreateFiles/Dockerfile
Notice that there is no explicit debug compose file. Instead, the wizard created an additional configuration in launchsetting.json for running or debugging via Docker Compose and that is one of the options for running with or without debugging, i.e. CTRL-F5 or just F5.
Conclusions
I have definitely sated my curiosity and feel that each of these options are equally sufficient for whichever development environment you are working in. That is, in my opinion, the key factor. Are you working at the command line or one of the IDEs? They will each give you a good, working head start.
docker init is going to be much more useful for people who just dive in to Docker with little advance knowledge because there is so much guidance embedded in the comments. The support for Visual Studio and VS Code also provide enough to get your app running but will require some help from Copilot or Dr. Google to satisfy more complex solutions and needs.