Note: This blog post explains theory as well as steps to implementing the stored proc. If you read my blog regularly, you are used to this.
11/30/09:Anoter note! Don’t miss the fact that this is for the verison of EF in VS2008 SP1. Things have been greatly improved in VS2010. Check out this *much newer* post: http://thedatafarm.wpengine.com/blog/data-access/a-big-step-for-stored-procedures-in-ef4/
As with the previous CTP Wizard, the Wizard in the new EF Tools (CTP2) will create functions in the Store Layer of the model to represent stored procedures in the database that the wizard is building a model from.
And as with the previous CTP, that’s all you get. It doesn’t implement it all the way through to the conceptual layer to be used in your applications. The documentation for the previous CTP showed how to complete DML stored procedures (Insert, Update & Delete) but not SELECT stored procedures that return data. So, I wrote a blog post in September that describes how to implement a SELECT stored procedure in EDM.
With the new tools, the Insert/Update/Delete functions are very simple to create now. Which is great. Select stored procedures with results that match an entity is also a breeze (see Guy Burstein’s blog post that walks through these).
But as of yet, there is no help for the Select stored procs that return miscellaneous results.
Therefore I wanted to update the instructions since you can do a few more things with the wizard for this. But you’ll still need to work with the raw XML of the EDMX file.
Let’s start with a simple example.
There is a stored procedure that I added to the AdventureWorksLT db that takes a year as a parameter and returns a list of Company Names with their total sales for the year. The resulting schema contains TotalSales, CustomerID and CompanyName. This result set doesn’t line up with any tables/views in the db or entities in my conceptual layer.
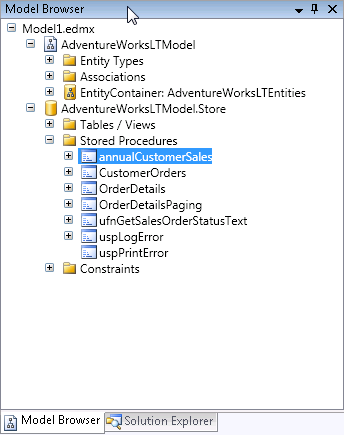
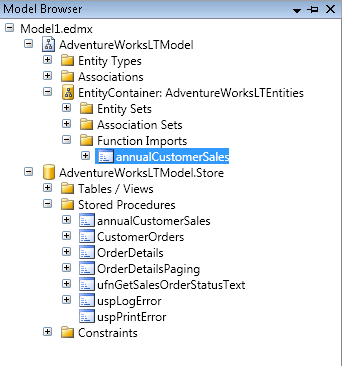
When the EDM is generated from the database the stored proc is realized in the StoreLayer. You can see this in two ways.
The Model Browser
Or in the raw xml of the EDMX file, in the Storage Section:
<Function Name="annualCustomerSales" Aggregate="false" BuiltIn="false" NiladicFunction="false" IsComposable="false" ParameterTypeSemantics="AllowImplicitConversion" Schema="dbo"> <Parameter Name="fiscalyear" Type="char" Mode="In" /> </Function>
You can see that it does not determine the output parameters, which would be a daunting task to build a parser for.
So you need to create the following:
1) An entity that matches the schema of the results (TotalSales, CustomerID, CompanyName)
2) A function in the conceptual layer that maps back to the function in the store layer (called an import function)
3) Every entity needs to map to something in the store layer, therefore you need a fake table in the store layer that matches the entity in the conceptual layer .
4) The entity in the store layer needs an entity set
5) Lastly, the entity in the conceptual layer needs to map back to the entity in the store layer.
#3 through #5 are extraneous to what we are trying to do, but EDM has rules that need to be followed, so we need to throw all that extra stuff in there. It would be great if we could somehow just map the function to the entity – or if we could just use the function and return an anonymous type. But we can’t. So, let’s just move forward.
This seems like a lot of steps, but once you do it, it will make sense.
Step 1) You can create entities using the designer, so this isn’t so bad. Create a new entity and add the properties that are returned in the results. Here’s what mine looks like:
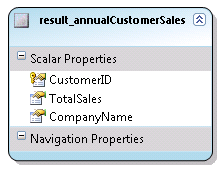
The customerID is flagged as a Key for the entity. An EntitySet will automatically be created. In my model it was named "result_annualCustomerSalesSet". Be sure to set the properties of the properties correctly (type, length, etc.) You can use properties of other entities in the model for clues as to what those values should be.
Save the model.
Step 2) Create an import function. In the Model Browser (right click in the designer and choose Model Browser if it isn’t visible), locate the stored procedure inside the Store layer (see screenshot above for a reminder). Right click on the stored proc and choose Create Function Import. You’ll get a screen where you need to fill out the Function Import Name and select an entity from a drop down list.
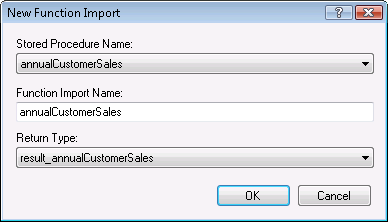
After you hit okay, the EDM will be updated and you will see the function import in the Model Browser.
Note that if the results matched an existing entity (a mapped entity, that is) you would be finished here.
Step 3) Create an Entity in the Store Layer that the result_annualCustomerSales entity will get mapped to. I cheat a little here by copying and pasting the Entity from the conceptual layer into the store layer then make appropriate edits.
In the conceptual layer it looks like this:
    After pasting this into the store layer section with the other EntityType elements, I edit so that the
store entity looks like this
<EntityType Name="result_annualCustomerSales"> <Key> <PropertyRef Name="CustomerID" /> </Key> <Property Name="CustomerID" Type="Int32" Nullable="false" /> <Property Name="TotalSales" Type="Decimal" Nullable="true"
Precision="19" Scale="4" /> <Property Name="CompanyName" Type="String" Nullable="true"
MaxLength="128" Unicode="true" FixedLength="false" /> </EntityType>
<EntityType Name="result_annualCustomerSales">
<Key>
<PropertyRef Name="CustomerID" />
</Key>
<Property Name="CustomerID" Type="int" Nullable="false" />
<Property Name="TotalSales" Type="money" Nullable="true" />
<Property Name="CompanyName" Type="nvarchar" Nullable="true" />
</EntityType>
If you need help determining what the property properties (eg type) should be, look at some of the other Entity Types in the store model for clues. I use the same trick with the conceptual entity to figure out precision and scale for the TotalSales property.
Step 4) You also need the EntitySet in the store layer. Copy and paste that, too.
Entity Set in Conceptual Layer<EntitySet Name="result_annualCustomerSalesSet"EntityType="AdventureWorksLTModel.result_annualCustomerSales" />Entity Set in Store Layer<EntitySet Name="result_annualCustomerSalesSet"
EntityType="AdventureWorksLTModel.Store.result_annualCustomerSales"Schema="dbo"/>
Almost done!
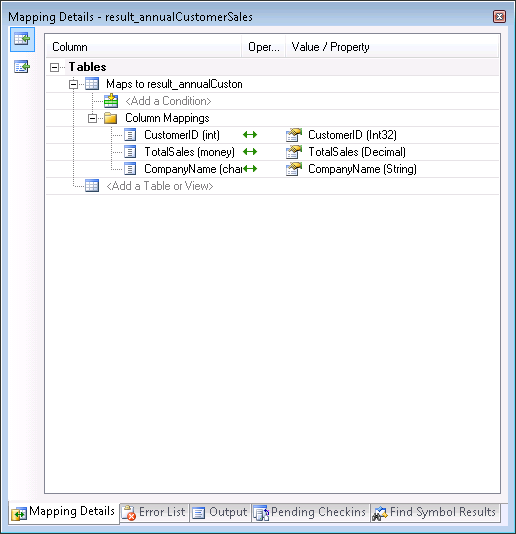
Step 5) Map the Conceptual Entity to the Store Entity.
If the Mapping Details are not showing, click anywhere in the designer and choose Mapping Details. By default it will show up in the same area as the error list, etc. in the IDE.
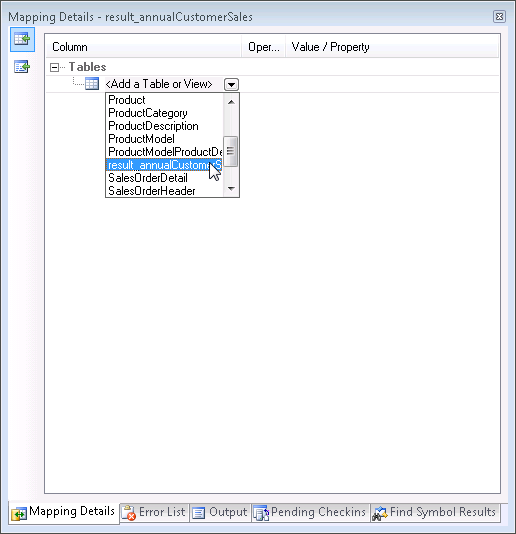
In the designer, select the new Entity. You will see a little info about it in the Mapping Details window. Drop down the list for "Add a Table or View" and choose the table definition you created in the store layer.
All matching properties will automatically be mapped.
FINALLY YOU ARE DONE!
Now let’s go to the code and see the sproc in action!
Dim aw As New AdventureWorksLTModel.AdventureWorksLTEntities
Dim qsales = aw.annualCustomerSales("2004")
For Each cust In qsales
Console.WriteLine(String.Format("{0}: Sales= {1:C}", cust.CompanyName, cust.TotalSales))
Next
Here’s a bit of the output
Aerobic Exercise Company: Sales= $2,361.64
Bulk Discount Store: Sales= $98,138.21
Eastside Department Store: Sales= $92,663.56
Coalition Bike Company: Sales= $2,669.32
Instruments and Parts Company: Sales= $70,698.99
Many Bikes Store: Sales= $81,834.98
Closest Bicycle Store: Sales= $39,531.61
West Side Mart: Sales= $87.09
Riding Cycles: Sales= $86,222.81
Futuristic Bikes: Sales= $272.65
Vigorous Sports Store: Sales= $1,170.54
Thrilling Bike Tours: Sales= $15,275.20
Trailblazing Sports: Sales= $45,992.37
Paints and Solvents Company: Sales= $14,017.91
Channel Outlet: Sales= $608.18
Thrifty Parts and Sales: Sales= $1,379.17
Engineered Bike Systems: Sales= $3,754.97
Essential Bike Works: Sales= $45.20