One of the announcements this morning at MIX11 was the MVC 3 Tools Update.
Phil Haack has a blog post about them here: http://haacked.com/archive/2011/04/12/introducing-asp-net-mvc-3-tools-update.aspx
I’m really happy to see that the newest MVC 3 Tools for Visual Studio embrace Entity Framework 4.1 in a big way, using the newly released EF 4.1 Code First as the default model for drag & drop MVC apps.
You can truly now get away with this scenario.
- Create some classes.
- Create an MVC 3 project.
- Reference the classes.
- Create one or more controllers based on those classes.
The tooling will pull in Entity Framework 4.1, create a DbContext, build the controller, build the views and add the appropriate code into the controllers to interface between the database and the views.
- Change the routing from Home to your model in global.asax.
- Run the app.
Running the app will trigger code first to create a database if it does not yet exist.
Result: a working app with full database interaction around the one or more controllers from your domain classes.
It’s not ready to deploy on, say, the Bank of America website, but it’s a pretty darned good start.
Here’s a closer look.
I start with a few classes in their own project, and for simplicity, I’ll just use the Blog & Post classes that I used for the MSDN Code FIrst video series I created.

Then I add in a new MVC 3 project, using all defaults (Internet Application and Razor view engine).
Notice that the template added in a reference to the EF 4.1 assembly (EntityFramework) and the core EF 4.0 assembly (System.Data.Entity).
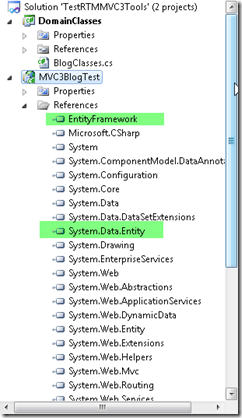
I make a reference to the DomainClasses assembly and then – important step!! – build the solution.
Now for a controller.
Right click on the Controllers folder and from the context menu, choose Add and then Controller.
Check out the new dialog:
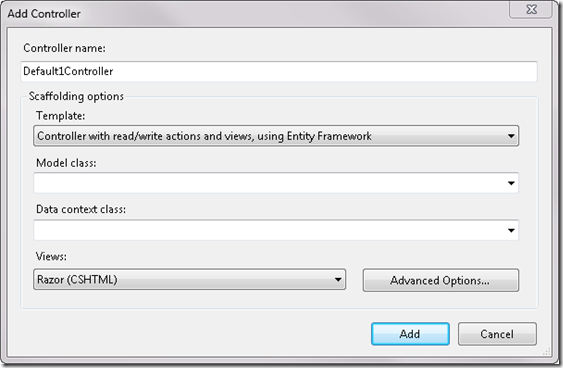
Template has a new option (and it’s the default): Controller with read/write actions and views, using Entity Framework.
Now when you add a controller you can get all of the views for free, rather than having to explicitly create them one at a time.
And “using Entity Framework” is a very new twist.
The next two options are why I had to build the solution. I want it to see the classes in my other project. I’ll choose Blog.
And now Data context class – also very new here. I don’t have one so I’ll choose <New Data Context> from the drop down
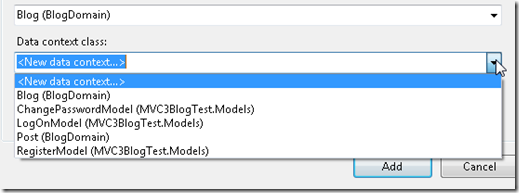
which will prompt me to name it
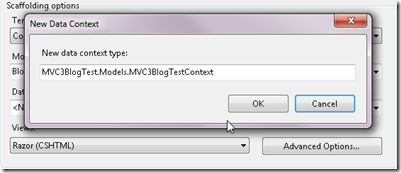
which I do:


After clicking add, the templates go to work. I sit back and relax for a moment.
When it’s finished here’s what I have…

The template added a new controller class, a new model context and a new set of views for my blog.
The context class inherits from EF 4.1 DbContext and exposes a DbSet of blogs. It also has some notes related to code first’s auto database generation

The controller is much smarter than the controller’s created by the previous tooling. Rather than simply creating the method signatures, it uses Entity Framework 4.1 code to provide the base interaction for each method. This is because I chose the create controller “using Entity Framework” option. It creates a class level instance of the context named “db” and uses that in the methods. It uses clean DbContext code such as the Find method which searches on the primary key field for the value you pass in. It uses the very nice Entry method to attach an edited Blog and change it’s state to Edited before saving. It uses the Find and Remove to perform a delete. Personally, I mimic the Edit method (Entry.State=Deleted) to save a trip to the database, but this works too.
namespace MVC3BlogTest.Controllers
{
    public class BlogController : Controller
    {
        private BlogDomainContext db = new BlogDomainContext();

        public ViewResult Index()
        {
            return View(db.Blogs.ToList());
        }

        public ViewResult Details(int id)
        {
            Blog blog = db.Blogs.Find(id);
            return View(blog);
        }

        public ActionResult Create()
        {
            return View();
        }

        [HttpPost]
        public ActionResult Create(Blog blog)
        {
            if (ModelState.IsValid)
            {
                db.Blogs.Add(blog);
                db.SaveChanges();
                return RedirectToAction("Index");
            }

            return View(blog);
        }

        public ActionResult Edit(int id)
        {
            Blog blog = db.Blogs.Find(id);
            return View(blog);
        }

        [HttpPost]
        public ActionResult Edit(Blog blog)
        {
            if (ModelState.IsValid)
            {
                db.Entry(blog).State = EntityState.Modified;
                db.SaveChanges();
                return RedirectToAction("Index");
            }
            return View(blog);
        }

        public ActionResult Delete(int id)
        {
            Blog blog = db.Blogs.Find(id);
            return View(blog);
        }

        [HttpPost, ActionName("Delete")]
        public ActionResult DeleteConfirmed(int id)
        {
            Blog blog = db.Blogs.Find(id);
            db.Blogs.Remove(blog);
            db.SaveChanges();
            return RedirectToAction("Index");
        }

        protected override void Dispose(bool disposing)
        {
            db.Dispose();
            base.Dispose(disposing);
        }
    }
}
The views are already built…to defaults.
Since the default model uses code first, it will create a database for me so all I have to do now is run the app – AFTER I change the default route in global.asax from”Home” to “Blog".

and finally : F5 (run the app)


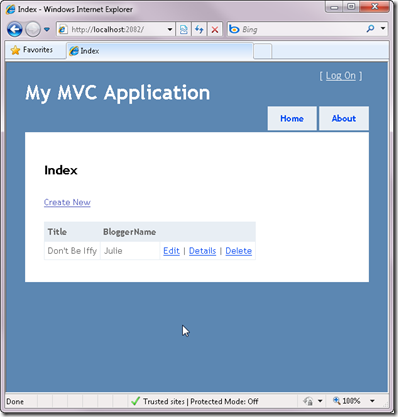
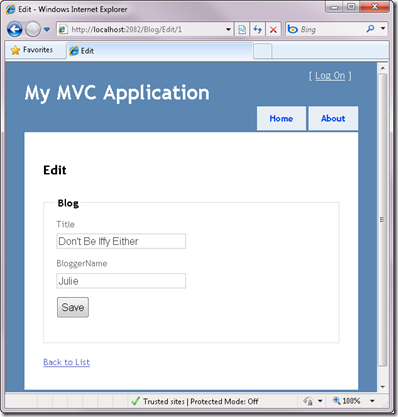
Now I’ll add a new controller for Post with ONE difference. I want my context to manage both Blog and Post classes because they are related. So rather than creating another context, I use the existing context.

This wizard modifies the BlogDomainContext to add in a DbSet for Post classes.

It doesn’t go back and change the Blog views so that you can navigate from a blog to a post. You’ll have to do that yourself. But the template DOES recognize the reference inside the post class back to blog and uses that in the default views that it generates for example:

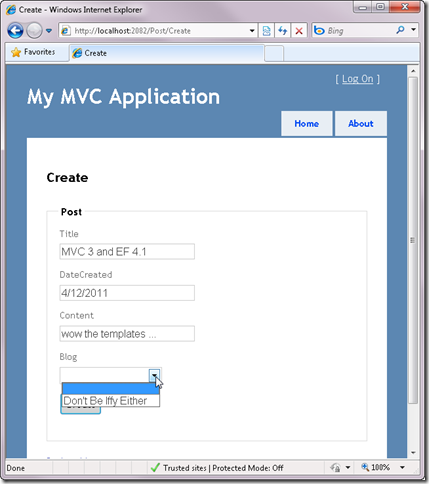

These templates provide a great starting point for MVC 3 newbies.
There’s a lot of refactoring I’d want to do, however, they are *templates* which means you can modify the template so that it generates things more to your liking. Or wait for someone else to do it.  I’m sure you’ll find plenty of great templates that incorporate more advanced patterns and practices available via nuget as soon as people get their hands on this stuff.


