I’ve been having a lot of fun with the new mssql extension for Visual Studio Code. I have an article coming in MSDN Magazine and am planning more fun as well. My latest experiment was doing a big mashup taking advantage of the fact that there is now a Linux version of SQL Server. So we are no longer limited to hosting it on Windows or Azure. The most lightweight way to host SQL Server on Linux is in a Docker container. While I am sitting in front of a MacBook typing this I’m by no means working towards abandoning my Windows development or Windows machines. I’m just happy to have more options at my disposal as well as have the ability to share what I am learning work beyond the world of Windows developers.
Containers are not stateful. There are ways around that (I’ll show you below) but I only know enough to be dangerous here. This is a great way to use SQL Server at design time. Using this for production is a totally different story and you need to do a lot more research and soul-searching before using that option.
On the other hand, there are those who do have that particular goal:
I had to go through a number of documents to do this and of course I got stuck even with those resources at my disposal. So I will share the full path of how I got this setup working.
Pre-Requisite
I already have Docker for Mac installed on my MacBook. Here is the installation link if you need to perform that step. Keep in mind that you can’t do this on a VM. I tried as I wanted to repeat this with a clean setup.
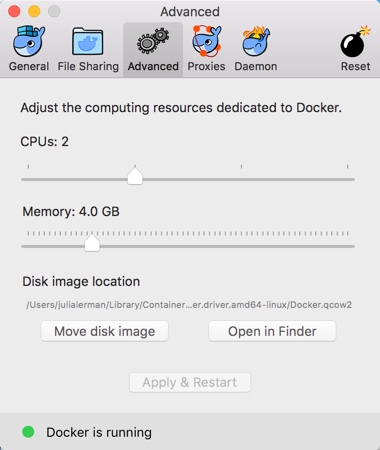
Be sure that Docker is set to use at least 4GB of memory.

Getting the SQL Server Docker Image
This is what makes the whole thing so easy! Microsoft has created an official docker image with SQL Server for Linux already on it.
In the terminal window, you can pull and install the official image with
sudo docker pull microsoft/mssql-server-linux
Once it’s installed, the ‘docker images’ command will show you that the image is now available on your machine.

Although I just installed it today, you can see that the image I’m using — which is the latest version — was created by Microsoft 3 weeks ago.
Spinning Up a Container (or Two) From the Image
Now that Docker is aware of the image, you can create a container from it — which is running instance of the image.
Because we’re on a Mac and awaiting for a “bug” to get fixed, we will actually create two containers.
Depending on your familiarity with Docker, you may or may not be aware that containers are not stateful. Once you delete a container, it’s all gone! If you have persisted data in that container, it, too, is all gone. However, Docker has a feature called “Volumes” which are a way to retain state between docker instances. So when one instance is shut down, the state is stored in a Volume. When another container instance is spun up, that volume provides the container with the state from the previous instance. This is how it’s possible to use containers for databases.
Here’s a great tutorial on volumes: https://rominirani.com/docker-tutorial-series-part-7-data-volumes-93073a1b5b72
And the official docker doc: https://docs.docker.com/engine/tutorials/dockervolumes/#/creating-and-mounting-a-data-volume-container
However there’s an issue (which looks like the resolution is around the corner) with Docker on Mac hosting the sql-server-linux image. This prevents us from using a volume for persistence in the simple way. So instead, we’ll create a separate container that is a “data volume container”, then we will point the container that will run SQL Server to the data volume container.
Creating the volume container
I’ll name mine mssqldata. Here’s the command to create it. (Don’t miss the full length of the command!)
docker create -v /var/opt/mssql --name mssqldata microsoft/mssql-server-linux /bin/true
This volume container still uses the image as its base. But we won’t be running SQL Server from this instance.
Creating the SQL Server container
Now you can create an container where you will run SQL Server and that container will use the data volume container for the persisted data.
docker run -e 'ACCEPT_EULA=Y' -e 'SA_PASSWORD=Passw0rd' -p 1433:1433 --volumes-from mssqldata -d --name sql-server microsoft/mssql-server-linux
The two environment variables (accept_eula and sa_password) are required. The userid is (gulp) ‘sa’. The password requirements are: “At least 8 characters including uppercase, lowercase letters, base-10 digits and/or non-alphanumeric symbols.”. Mine’s really fancy!
Once these exist,
docker ps
will only show you the regular container. The volume container is hidden so you need
docker ps -a
to see it.
 Notice that the container I will run SQL Server on is on a port whereas the data volume container has a different status “Created”, and is not exposed on a port.
Test the Connection From the SQL Command Line
You don’t have to do this but it made me happy and it was fun. Did you know that you can interact with SQL Server from the command line? The tools are installed inside the container but that’s a messy way to use them. It’s easier to just install them on your computer directly. The command lines tools for Mac are sql-cli.
Note: On May 16th, Microsoft released the macOS version of sqlcmd and bcp (bulk copy). Good to know if you are already familiar with sqlcmd. Here’s their blog post with more details.
You can install that with:
npm install -g sql-cli
Start it up with the mssql command.
To minimum you need connect is to identify the server (which is at localhost by default, you don’t need to specify the port) and the password. It will presume sa for userid.
mssql -s localhost -p Passw0rd
If it’s successful, you’ll get some information followed by a new prompt, mssql.
Connecting to localhost...done

sql-cli version 0.4.14
Enter ".help" for usage hints.
mssql>
Enough of that. Now I get to use my new favorite tool. The mssql extension in Visual Studio Code.
Connect in Visual Studio Code
Once you have mssql installed in VS Code, you can begin by creating a new sql file. Either via the commands (F1 for the command pallete, MS SQL to see the commands and then New Query. This will prompt you for a connection – one parameter at a time. YOu can also start with the MS SQL Connect command (⇧⌘C). The extension will prompt you for each parameter.
Server name:  localhost
Database name: (enter)
User name: sa
Password: Passw0rd
Save Password (yes or no)
Profile name: [your choice]
If you enter everything correctly, not only will it connect, but the details will get stored as a connection profile in the VS Code settings and be available for subsequent connections.
You can see the connection status as it is connecting and then when connected in the lower right hand corner of the IDE.

In the SQL file open in the editor, you can type SQL and see some existing snippets as well as get help from Intellisense whicih has read the schema of the data on the server. So far there’s not much.
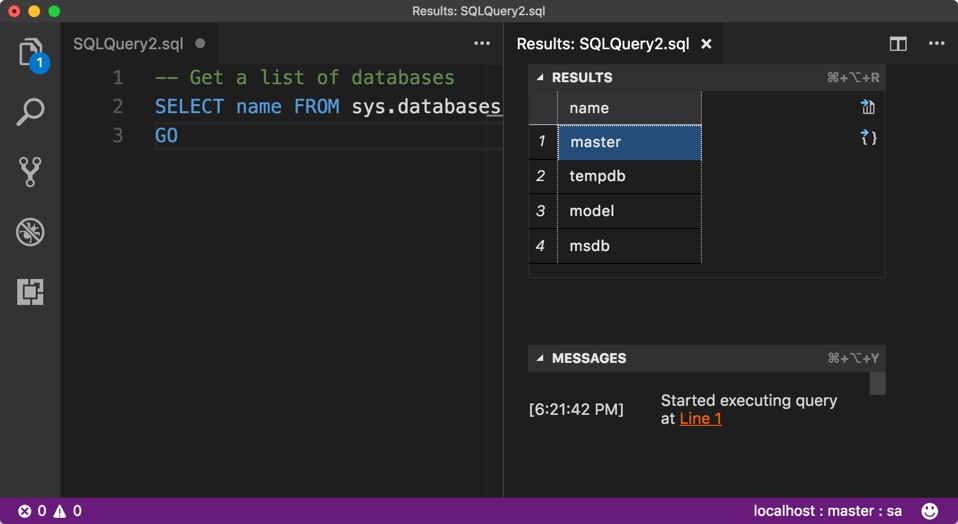
Selecting the sqlListDatabases snippet and then executing it (right click for Execute Query on the context menu or ⇧⌘E) displays the databases:

Now you can use TSQL to create databases, database objects, query data. In the results pane you will see data as a grid similar to what you might see in SSMS. You can also export results to CSV or JSON. I’ve recently written an article about all of the cool things you can do with mssql which will be in teh June 2017 MSDN Magazine. But that connects to a SQL Azure database. In the meantime you can just go to the docs for the extension (aka.ms/mssql-marketplace).
Creating a Database and a Table
I let some more snippets help me to create a database and a table.
The first was the sqlCreateDatabase where I changed the snippet’s database name placholder to create a new database called LinuxReally then executed that with ⇧⌘E.
Re-running the select name from sys.databases command showed that the new database was now in the list.
Next I leveraged the sqlCreateTable snippet to help me create a new table. I named teh table DatabasesIKnow and gave it three columns
CREATE TABLE dbo.DatabasesIKnow
(
  Id INT NOT NULL PRIMARY KEY, -- primary key column
  DatabaseName [NVARCHAR](50) NOT NULL,
  KnowIt [Bit]
);
For some reason, the intellisense cache did not automatically refresh when I created this. Possibly becuse it was a new database. Even the mssql extension’s Refresh Intellisense Cache command did not kick it in. I got it working by disconnecting and reconnecting this time choosing the LinuxReally database rather than letting the extension connect to master by default. When I did that, I could see the message “Updating Intellisense…” in the status bar. After I had done this, the intellisense did auto refresh any time I modified the database schema.
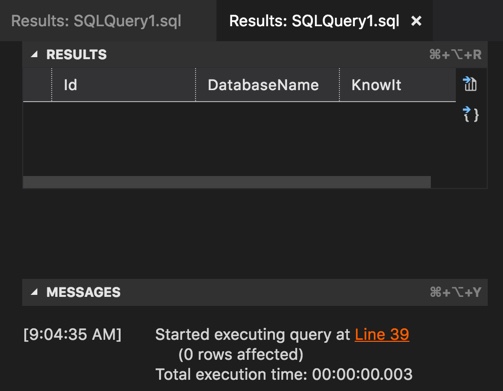
Once i had the new database, I could execute “select * from dbo.DatabasesIKnow” and see the proper results. In my case, since I haven’t added data, there were no rows. But clearly it was reading from my table.

Taking Down the sql-server Container
Now come the big docker volume tests. I first disconnected from the database inside of VS Code with⇧⌘E. Then I stopped and removed the sql-server container with the two commands:
docker stop sql-server
docker rm sql-server
But I left the data volume container (mssqldata) running.
I then created a new container instance using the same command as earlier:
docker run -e 'ACCEPT_EULA=Y' -e 'SA_PASSWORD=Passw0rd' -p 1433:1433 --volumes-from mssqldata -d --name sql-server microsoft/mssql-server-linux
In VS Code, I think reconnect to the server and my new database which was easy since it had been stored in the connection profiles . It’s the first one, localhost: LinuxReally.

The connection was successful and listing databases showed my new DatabasesIKnow database . Select * from that database showed the schema. So my database was persisted in the data volume container even though I had killed and recreated the sql server container.
Next test: take down both containers.
Now it was time to see what happens when I stop and remove both containers!
docker stop sql-server
docker rm sql-server
docker stop mssqldata
docker rm mssqldata
Next I use the same command I used previously to restart the sql-server container with the parameter to use the (not running) mssqldata volume container.
docker run -e 'ACCEPT_EULA=Y' -e 'SA_PASSWORD=Passw0rd' -p 1433:1433 --volumes-from mssqldata -d --name sql-server microsoft/mssql-server-linux
That fails. I need to first run the data volume container. Unfortunately, I re-ran the create command for that and overwrote the existing container, so all was lost. GOOD LESSON THERE! 🙂
So I started from scratch. In the brand new data volume container I recreated my database and table.
After more experiments, I realized that I had misunderstood the Docker documentation on volumes. You can create copies of data volume containers and remove those. But you need to be more of a docker ninja. While you can make all kinds of copies of the container, once you RM all of the related volumes, it is gone gone. This blog post does clarify some of the info I was still confused about wrt creating/backing up/restoring data volume containers: tricksofthetrades.net/2016/03/14/docker-data-volumes/.
So the bottom line is you need to leave the Data Volume Container running in some format (the original or some flavor of copy). (I’m still finding it hard to believe that it doesn’t somehow get stored as a file you can re-run so I will update this as soon as someone corrects me!)
Windows, Mac, Linux, Azure and Anwhere You Can Host a Docker Container
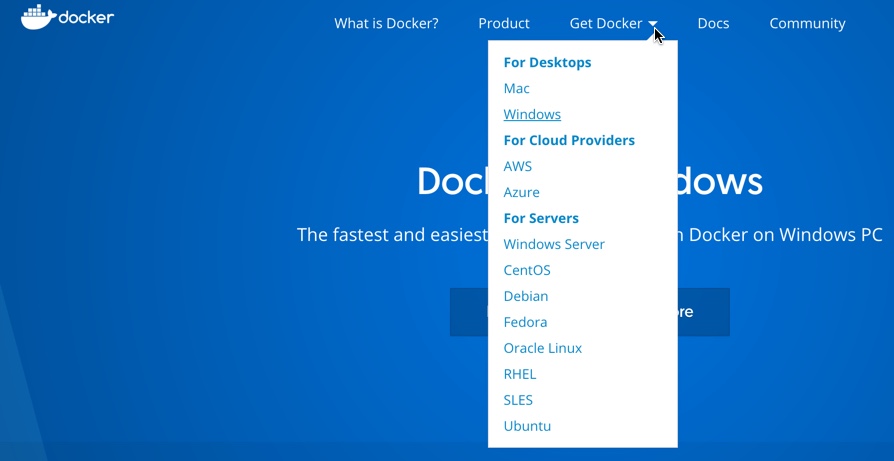
And if you think this is only somehting to do on OS X (because that’s where I’m doing it) .. no no no! Did you know there is now Docker for Windows? And that VS Code is cross platform? This is such a great way to quickly get SQL Server up and running in your development environment.

And as I said on twitter, comparing the experience of pulling the docker image and spinning up a container to the experience of installing SQL Server on windows is something like this:


 Notice that the container I will run SQL Server on is on a port whereas the data volume container has a different status “Created”, and is not exposed on a port.


