I have a lovely pair wide screen monitors with 1080p resolution. However, when recording software training courses for Pluralsight, we are asked to use a resolution of 1280×720 so that text and code are legible across a variety of devices and sizes.
Therefore, when recording a course, which may take me many many weeks, I tend to leave one of my monitors at 1280×720. But I’m constantly doing other things on that monitor such as email or writing and that resolution is discomforting.
There is no easy way to change the resolution other than going into system settings. But I now have a super easy way to change that monitor’s resolution back and forth.
Like many of us who are now creating content at home (although I am not streaming on twitch like many of my friends) I recently added an Elgato Stream Deck controller to my toolkit, along with some key lights, too! I use the stream deck to control the lights while recording video that requires that I be in it.
Step 1: Find a command line tool for affecting screen resolution.
There are some apps and there are a few CLI tools. After asking around on Twitter, I learned about Display Changer 2, used by two very trusted nerds (and friends):
However, there are TWO versions of Display Changer and DC2 is the programmable one. So not knowing there was a simpler version, I got stuck on a path that was way more complicated than I needed. I learned how to create xml configuration files for various display settings, then create a PowerShell script to execute DC2 against those config files. But Stream Deck can’t run PowerShell files, so then I had to create a batch file to run the PS1 file. It was madness but I was determined and got it all working. And then blogged the very complicated path. Oy vey!
Then back to my brainy pal who said…well, y’know….:
Now this is my pal from whom I learned YET A BETTER WAY to load utensils into a dishwasher that I am now obsessed with (the dishwasher trick, that is. I do like Glenn, but no, I’m not obsessed with him)! So I always trust him, but I looked at that and thought “DC2 doesn’t have these switches and what is DC64?”.
I went back to 12noon’s website and realized that the “Display Changer” is different than “Display Changer II” and is a simpler tool to work with. Even though I felt like such a dope for getting stuck on the complicated path, I was happy for the MUCH EASIER way! So if you haven’t ever configured a Stream Deck button, let’s finish this up with Glenn’s easy street way.
Step 2: Identify the Monitor
I’d recommend practicing the command at the command line before just shoving it into Stream Deck. Also, since I was aiming for my secondary monitor, I needed to use the
dccmd -listmonitors
command to find out how to address that monitor. Turns out it’s
"\\.\DISPLAY2"
So the command to change that monitor’s resolution to 1280×720 is:
"C:\Program Files (x86)\12noon Display Changer\dc.exe" -monitor="\\.\DISPLAY2" -width=1280 -height=720
In the Stream Deck app, drag the System/Open option onto the button you want to configure for 720p.
In the settings, leave Title blank.
In the App/File setting, paste in your command:
"C:\Program Files (x86)\12noon Display Changer\dc.exe" -monitor="\\.\DISPLAY2" -width=1280 -height=720
In the icon selector, you can choose Create New Icon to design then download an icon for your button.
Setup another button to change the monitor back to your default resolution. Mine is 1080p.
"C:\Program Files (x86)\12noon Display Changer\dc.exe" -monitor="\\.\DISPLAY2" -width=1920-height=1080
Originally these were the icons I crated for my buttons. They are good enough for me and bright colors.
But Glenn was unimpressed and created some new ones and sent them to me. I’m sure he’ll be happy for me to share them.
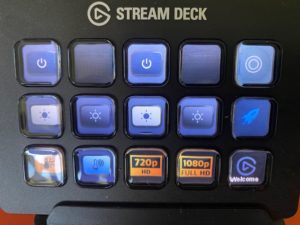
Here’s the Stream Deck with it’s new buttons. The setup works like a charm!
 I spent much of the fall and winter updating my three EF Core courses.
