Category Archives: Tools

Restarting Outlook Rules When They ALL Stopped Working

Rick Strahl reminded me of a great use for my nearly abandoned blog (especially as Twitter has lost its bloody mind)….memory storage! And I just solved a nagging problem so decided to “log” it here on my blog not only for my own future reference but perhaps to help someone else too.

If I explicitly ran the rules whether online or in the Windows Outlook client, that worked (and was time consuming).  But they stopped automatically being applied on incoming emails.

I found many articles via googling the problem. Many alluded to the rules file being too large. I removed old rules and compressed multiple rules for people at the same company. Still no luck.

There were other suggestions related to local outlook files, but the problem was on the server.

After 4 days of revisiting the problem, reading more and trying again, I finally, by chance, happened upon the solution for MY problem.

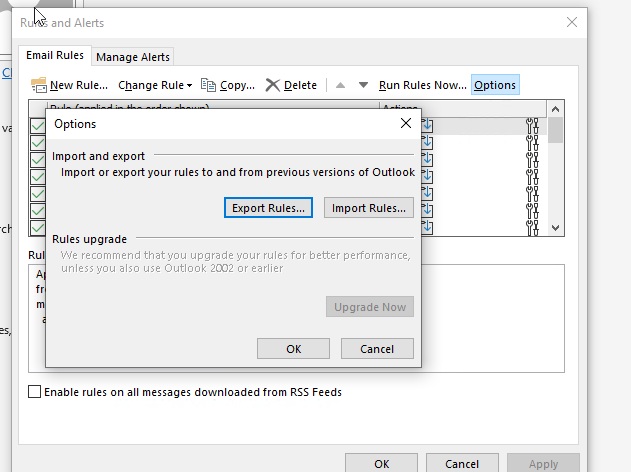
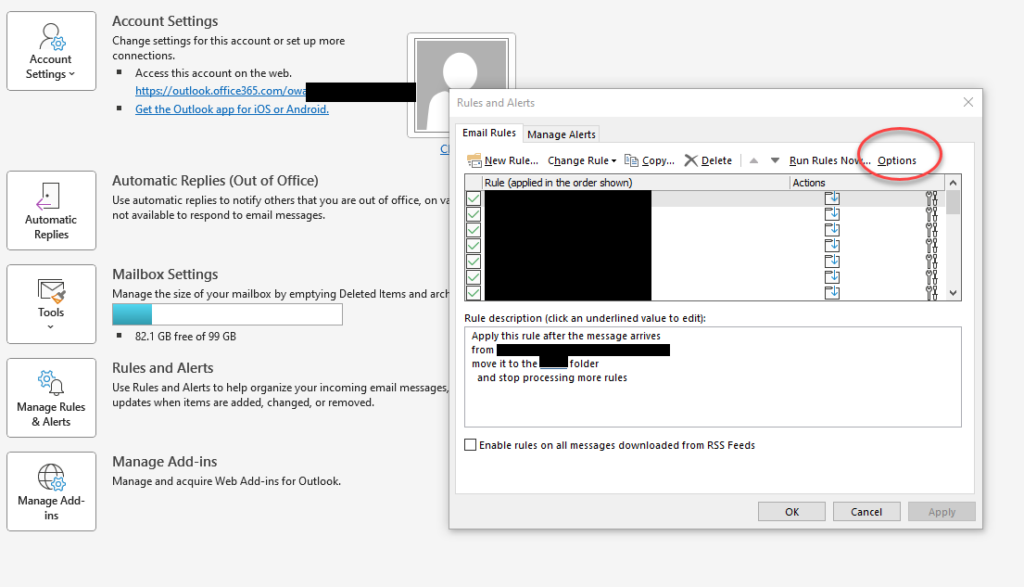
In the Manage Rules & Alerts, I had noticed (and ignored multiple times), under the Options “tab”:

There is an option to import and export.

So I exported the rules, deleted them all from outlook, verified that they were also gone from the online Outlook, then imported the file. 

It didn’t take long to see that the rules were working again. My most used one I think is the rule that any email with the word “unsubscribe” in it that hasn’t already been moved to another folder, goes into one called “Promotional”. 

Getting the SQL Server 2019 for Linux CTP2.0 Docker Image

If you are used to pulling the mssql-server images from the microsoft repository, e.g.,

docker pull microsoft/mssql-server

that won’t work for the 2019 CTP.

I was able to repull (aka update) using the former repository, but that wasn’t working for the CTP whose tag is vNext-CTP2.0-ubuntu.

I finally noticed the new docker pull command on the docker hub page for the image

It says: docker pull mcr.microsoft.com/mssql/server

So the command for pulling the CTP using it’s tag is as follows:

docker pull mcr.microsoft.com/mssql/server:vNext-CTP2.0-ubuntu


Copying an Azure Function App using the Portal, GitHub and Cloud Shell

I’ve got an Azure Function App with some functions that I built for a demo for a conference session. I first used this at AngularMix and had named the function app AngularMix2017. Then when I did it for DevIntersection this past week, I recreated it as DevIntersection2017 because you can’t rename a function app. I’m doing it yet again next week at another conference (NetConf.co) and decided it was time to create it as a reusable name: DataApiDemo.

While you can’t flat out copy a function app if you are working strictly in the portal (which is how I’ve been working during my first learning stages of building function apps), you can easily enough duplicate it by downloading and uploading it again.

Keep in mind that if you are developing functions in VS 2017 or VS Code (combined with the Azure CLI) you can just use the tooling to publish the function apps along with the settings. But I don’t like to take the easy path. I learned a lot of new tricks and tools by going this route. Even if I leverage the tooling on my next go round, I’ve learned a lot which gives me a better understanding overall, more control and troubleshooting skills.

My first step was to create the new function app (dataapidemo).
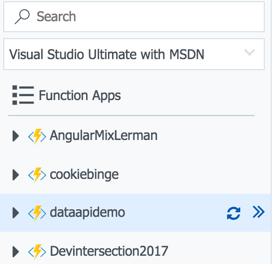
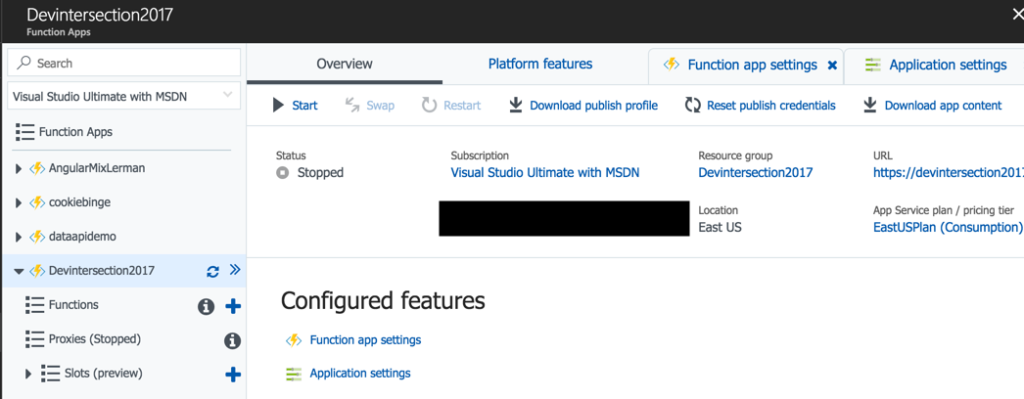
The Overview blade of an Azure function app has a “download app content” option. That will pull down all of the relevant files onto your machine. So next, I go to the overview of the DevIntersection2017 function app and click on the download app content link.
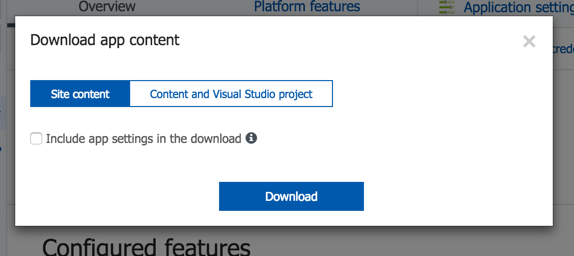
When downloading the app content, you have an option to also grab the app settings. I have a number of secrets stored in my settings ..things like keys to my databases , account ids and more. If you check that, the settings will get downloaded to a local settings file. If you were using this feature to continue your development locally, e.g. in VS2017, then you’ll want them. But for my scenario, they are not useful and even potentially a security issue (you’ll see shortly) so I’m going to leave that unchecked.
I can see the files in the designated folder on my computer.

I’ve already created a Github repository to store these files in: https://github.com/julielerman/DataApiAzureFunctions.

At the command line in the new folder, I’ll git init, add all of the files into the local repo and commit them. Then I can run the git commands to connect that folder to my GitHub repo and then push my local repository into the online repository.
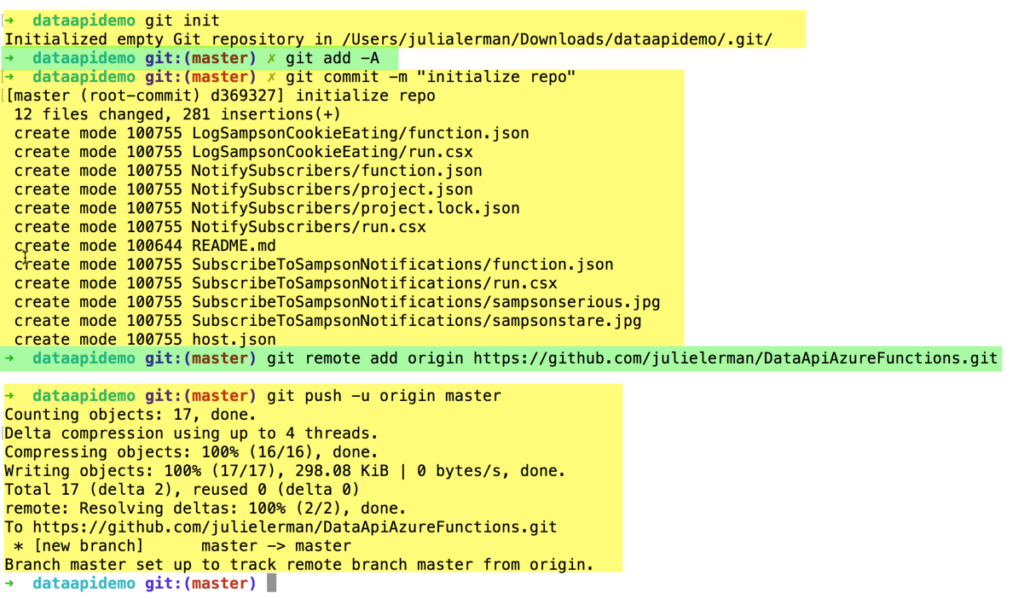
When that’s complete, the files are all in my GitHub repo.
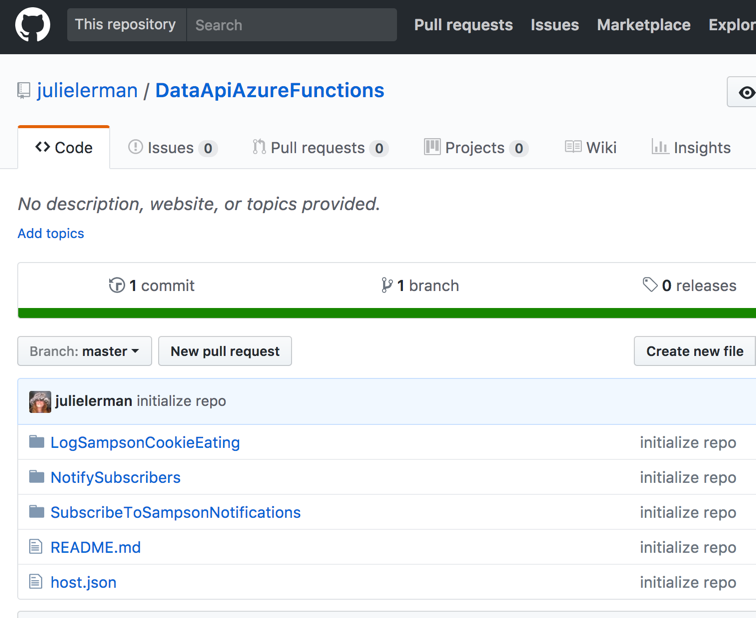
Since I’m using a public repository, this is why I didn’t want the local.settings.json file filled with my secrets to download. Of course I could have deleted it locally or told Git to ignore that file. A few other points about this. If I were developing this locally, then I can have that file locally and use VS2017 or Azure CLI tools to publish my app along with the settings to the portal. But that is not my goal here.

Now I can take advantage of a long-time feature of the Azure Portal: connect it to a repository to auto-deploy from the repository to my app (in the case to my function app).

Back in the portal, I select the new function app again, then from its Platform Features page, open the Deployment Options. Choose Setup new deployment and follow the steps to connect the function app to your repository. When you’ve completed the setup, you can use the Sync button to force the deployment to happen. All of the files are now in my new dataapidemo function, including the function.json files that contain the function setting (e.g. integrations etc) and any other files I may have added to my functions.

Because I am using Twilio, one of my functions has a reference to Twilio in a project.json file and I need to restore that package to this function app. I did that by opening up the project.json and making a small mod to it..adding or removing a blank line, then saving it. That triggers the package restore to happen.

What’s not there however are the function app settings. These are settings that are defined to the app and used by one or more of the functions. There are some default settings created by Azure but I also have some others …those secrets, such as the account and telephone number for my Twilio integration as well as a key for the function.

Some of these settings are my own custom settings that I want in the new function. I could add them in via the portal app settings interface, but I don’t like that path when I have a slew of settings.

That means moving on to yet another amazing tool in the Azure Portal — Cloud Shell. Here you can run Bash or Powershell commands from the Azure CLI directly on services in your subscription. You can also do this locally on your machine with the extra caveat that there you must provide credentials and other metadata.

In the portal, open the Cloud Shell. This is gives you an interactive terminal window.

If you have multiple subscriptions, you want to be sure that it’s set to the one where your app function is stored.

You can do this by listing the subscriptions with the az account list command.
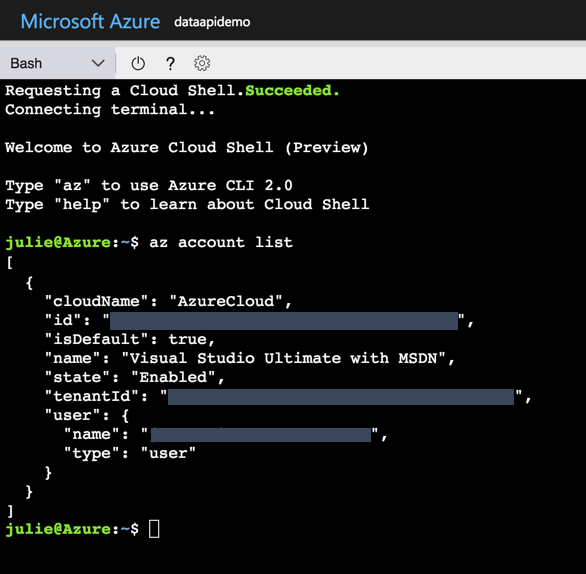
If the one you want is not default, then set it with:

az account set -s [ID]

This shell can do auto-complete so if the id starts with a123, you can type

az account set -s a123

then hit the tab and the id will get finished . Hit enter and it becomes the default subscription to work in.

I’ll use the azure functionapp commands to get the settings into my function app.

First I’ll list the existing settings. You do this with the command

az functionapp config appsettings list --name [functionname] --resource-group [resource name]

The parameter shortcuts for name and resource-group are -n and -g. Mine are both the same name: dataapidemo. Here’s what the command looks like (except for the wrapping that my blog is forcing):

az functionapp config appsettings list -n dataapidemo -g dataapidemo

The appsettings are listed out as JSON by default although you can affect the output format with the output parameter.

I’ll need to see the settings I want to copy from the other function app so I run:

az functionapp config appsettings list -n devintersection2017 -g devintersection2017 -o tsv

which give me the list of settings from which to choose.

In addition to listing the settings, you can add new ones with the set verb and delete with delete verb. Both would go in place of the verb list.

You use SET by combining the SET command and the –settings parameter. After the –settings parameter, you can list one or more setting with this format:

az functionapp config appsettings set -n dataapidemo -g dataapidemo --settings "property1name=value", "property2name=value"

Note that this is wrapping here on the blog post but not in the shell window.

So I added the handful of settings I wanted to add which looked more like:

az functionapp config appsettings set -n dataapidemo -g dataapidemo --settings "TwilioSID=myvalue", "TwilioAccount=myvalue"

There were others I had to add. For example, my function needs to know how to get to my Cosmos DB document database, so it has a setting that uses the db name as the property name and the dbs account endpoint as the value.

Once I had done that, I was able to get rid of the function apps that were named for each conference and use a common one no matter where I am sharing it.

And boyohboy did I learn a lot of new things!
New Pluralsight Course: Interacting with SQL Server data in Visual Studio Code on Win, Mac, Linux

imageMy latest course on Pluralsight, Cross-platform SQL Server Management for Developers using VS Code, went live earlier this month (just as I was about to hop on a plane for 2 weeks of conference travel!)

This is a course on a Visual Studio Code extension that I enjoy using so much that I wanted to share it with you. It is the mssql extension which lets you interact with SQL Server in a fairly rich way that belies the lightness of the IDE which it extends. Because VS Code is cross-platform, so are all of its extensions. So you can use this while you are coding on Windows, Mac or Linux and want to do some basic interaction with a SQL Server database.

As SQL Server examples, I used SQL Server LocalDb on Windows, SQL Server for Linux in a Docker container on a Mac and Azure SQL in the cloud. The course starts not only y showing you how to install VS Code (and some VS Code basics) and the extension but also by walking you through how to set up each of the database servers. That means it also has a lesson on Docker , installing and running an image as well as a quick start on creating a new SQL database in the Azure portal.

Once everything is set up, I dig through the features and functionality of the mssql extension. And I turned over ever possible stone to make sure you don’t miss helpful features which is the norm if you just start using such a tool without any preparation.

The course is mostly demos and very light on Powerpoint slides and I do work in Windows, on my Macbook and even in a Linux virtual machine.

imageWhat I’m also proud about this course is that if you’ve never used VS Code before, you’ll learn how to get around this amazing editor. If you’ve never used Docker before, I provide a really helpful and gentle introduction and you’ll be able to work with it. I had some great support from the team responsible for this extension as they were so happy to have this kind of attention paid to it.

So whatever language you code in, whatever O/S you work on, if you are using SQL Server (or interested in using it), this course should be a great help in mastering this very handy extension!

Below is the Table of Contents for the course.

If you need a 30-day free trial to the Pluralsight library so that you can watch this, send me a note!


Module 1: Introducing and Installing VS Code and the mssql Extension

In this module you’ll get a short introduction to the cross-platform and free developer IDE, Visual Studio Code and its mssql extension, The extension allow you to perform some key interactions with a SQL Server database without leaving the IDE. You’ll also walk through installing both the IDE and the extension on Windows and macOS

  • Module and Course Overview
  • Introducing Visual Studio Code and the mssql Extension
  • Installing Visual Studio Code on Windows
  • Installing Visual Studio Code on macOS
  • Introducing Visual Studio Code’s Coding Super Powers
  • Installing the mssql Extension in VS Code


Module 2: Preparing SQL Server for Any Platform, Locally and in the Cloud

In this module, you’ll learn how to set up a variety of SQL Servers. All of them are quick to install. You’ll learn to install SQL Server LocalDb on Windows, create an Azure SQL Database in the cloud and use a Docker image of SQL Server for Linux to quickly spin up SQL Server in a container on macOS. This will ensure that you have a SQL Server database to interact with in the rest of the course.

  • SQL Server LocalDB: The Simplest SQL Server
  • Setting Up an Azure SQL Database in the Cloud
  • Verifying the New Azure SQL Database
  • Setting Up the Last Details of Your Azure SQL Database
  • Using a Docker Container to Host SQL Server for Linux on Any O/S
  • Installing Docker and Getting the SQL Server Container Running
  • Verifying the Containerized Database
  • Understanding Persistence and Lack of Persistence in Containers
  • Pulling a Custom Image with the Sample Database in Place


Module 3: Connecting to the Various SQL Servers From Various Platforms

In this module, you’ll learn the ins and outs of connecting to a variety of local, cloud and containerized SQL Servers with the mssql extension. You’ll learn how to use the commands and shortcuts, how connection profiles and passwords are stored and even how to create a handy shortcut for getting mssql started.

  • mssql’s Commands and Execution Engine
  • Connecting to LocalDB While Learning More About mssql Connections
  • Connecting to Azure SQL from Windows and macOS
  • Demonstrating How mssql Securely Stores Your Passwords
  • Using ADO.NET Connection Strings to Connect
  • Connecting to the Database in the Docker Container
  • Connection Keyboard and Status Bar Shortcuts
  • Creating a Keyboard Shortcut to Start up mssql and Connect

Module 4 : Learning the mssql Basics to Connect, Query and Create

In this module you’ll start interacting with the database, executing queries and commands, and exploring  result sets. You’ll learn about the snippets and also learn about attaching to existing database files and creating new databases from scratch. Most importantly  you’ll learn about the great SQL editor and result view support that the mssql extension brings to you.

  • Attaching an Existing Database File
  • Interacting with the Results of Your First Query
  • The Intelligent Editor Window
  • Using Snippets to Speed Up Command Building
  • Exploring Multiple Result Sets Further
  • Using Snippets to See Database Metadata
  • Creating Databases, Tables and Data

Module 5: Leveraging Advanced Tips & Tricks

This module will dig deeper into mssql and provide tips that take advantage not just of mssql features, but also capabilities of Visual Studio Code to make using mssql easier.

  • Exporting Results to CSV, JSON or Excel
  • Localization of mssql’s Messages
  • Controlling Behavior Through VS Code’s Settings
  • Formatting Code in the Editor Window
  • Results Window Tricks, Shortcuts & Settings
  • Checking Out the Last Few Settings
  • Creating Your Own SQL Snippets in VS Code
  • Looking Ahead to Integrated Authentication on Mac and Linux

Cloning a GitHub Repo in Visual Studio 2017 …and a Quiz

When showing off some VS2017 features at our VTdotNET meetup, I made a last minute decision to demo the ability to clone a repository right from GitHub. Then I thought I would combine that with other things I planned to demo.

I already had just the right repo sitting in my GitHub account. A small ASP.NET Core project that was built with Visual Studio 2015 using project.json for its metadata. It’s at https://github.com/julielerman/NetCoreSolutionToMigrateToVS2017.

I had this same solution on my laptop already to use for another demo: showing off VS2017’s ability to auto-migrate a project.json based solution to the new csproj based format for .NET Core projects.

Clever me, I decided to kill two birds with one stone. Clone the repo and have the migration run as it was opening that solution.

So I started up Visual Studio 2017 (since I wanted to show how fast that is) and began the process of cloning the solution from my GitHub repo. I already had my credentials set up and was able to go to File, Open and Open from Source Control.

2017-03-21_21-52-52

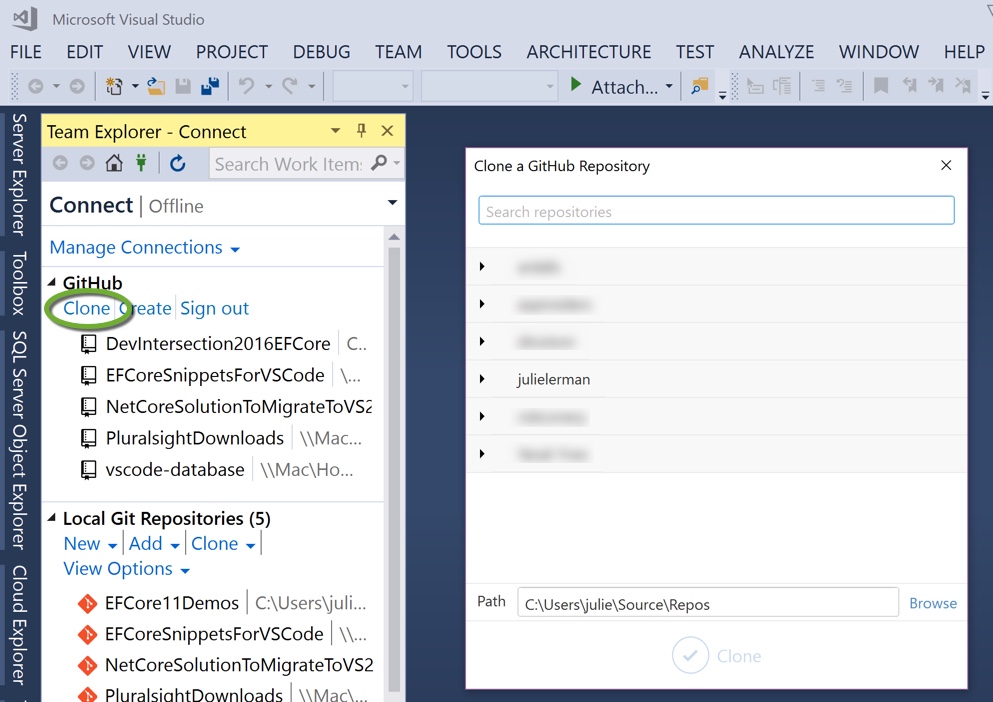
This opens the Team Explorer window and I clicked the Clone option, which then opened a window showing all of the accounts I’m connected to.

2017-03-21_22-06-28

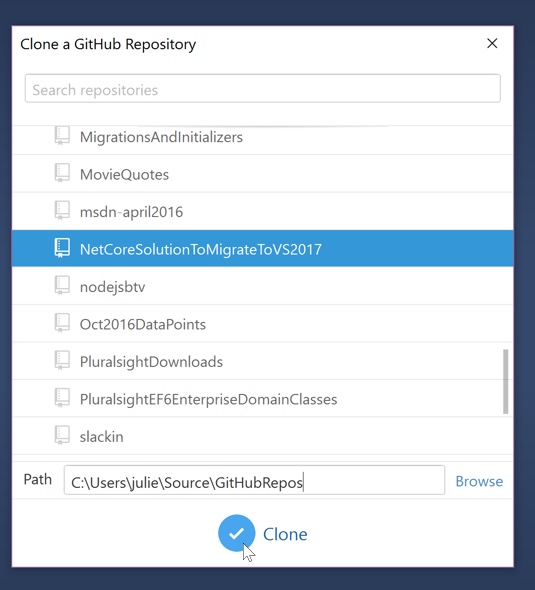
I expanded my own account and scrolled down to the repo I wanted, selected it and clicked the Clone button.

2017-03-21_22-11-20

The solution got cloned and then it opened up in Visual Studio.

2017-03-21_22-13-53

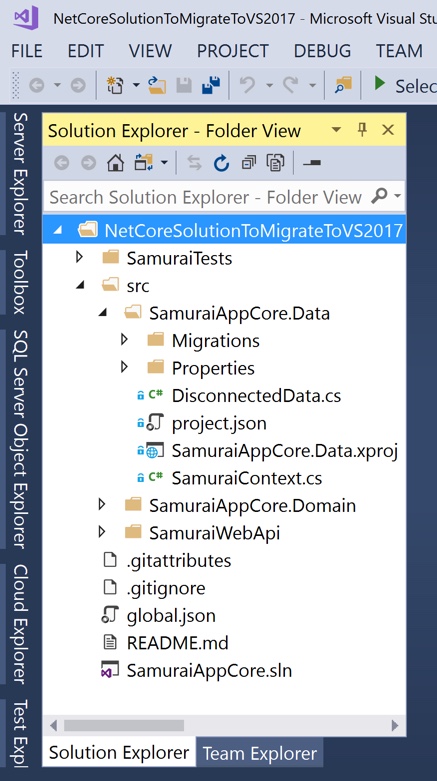
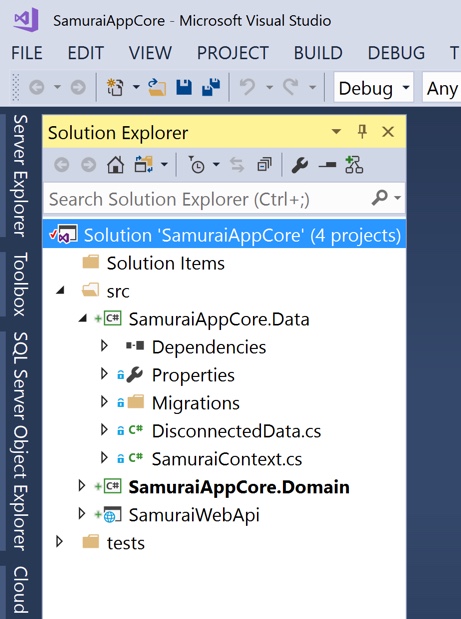
But it never triggered the migration! And if you look at the solution, you can see that the project I expanded still has its xproj file and its project.json file. At the time I was confused but now that I know what happened, the answer to why this didn’t migrate is very visible in that screenshot of the Solution Explorer. However, one of the developers who was watching this and had just done another demo with Visual Studio 2017, identified the problem quickly.

Let’s move on for some more clues.

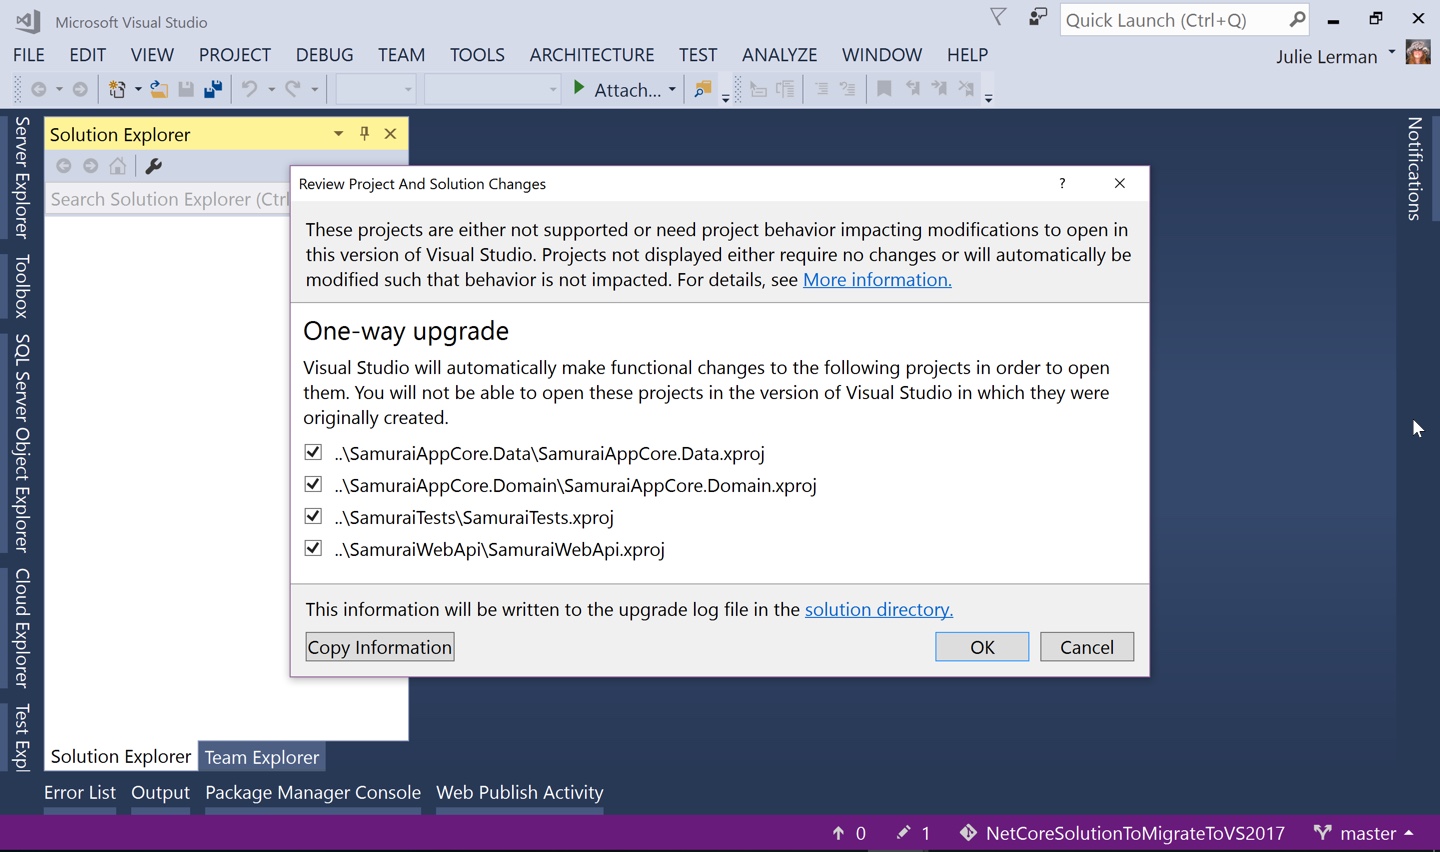
I closed the solution. Then from File/Open, I browsed to the place where it had been saved on my computer, and selected the sln file to open. This time, the same exact solution opening up in VS2017, did indeed trigger the migration, which is quite obvious thanks to this screen.

2017-03-21_22-18-17

Then I let the migrate feature do its job. When it was finished, you can see that the project no longer has its xproj and project.json files.

2017-03-21_22-21-42

Now, look at this new Solution Explorer screenshot compared to the previous one.

And then take a look at the list of new VS2017 features in the Release Notes (https://www.visualstudio.com/en-us/news/releasenotes/vs2017-relnotes) under the section IDE and see if you can tell what the cloning did differently when opening the solution than just opening the solution directly from the drive.

Also, I will find out if this is by design or possible a behavior that can get modified to behave the way I had expected. 🙂

Visual Studio Code Snippets to Make Coding EF Core a Little Simpler

I’ve been using the user snippet feature of Visual Studio Code to make it easier to get some of the code I commonly use for EF Core into my files. For example I have C# snippets for DbContext to create a constructor overload that takes in a DbContextOptions parameter, OnConfiguring or OnModeling . I have json snippets to add in the EFCore Commands dependency and the Tools section with EF Core tools.

github.com/julielerman/EFCoreSnippetsForVSCode

I finally created a github repository to share them. Since you’ll need to add the csharp snippets into your existing csharp snippets and the same with the json, i have put them into separate csharp.json and json.json files from which you can copy and past my snippets into your own.

Although the instructions are on the user defined snippets page I just linked to, the TL;DR is:

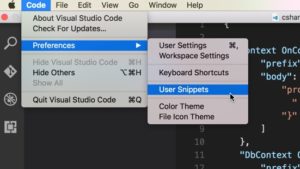
From menu, choose Code, Preferences then User Snippets

2016-10-30_11-56-58

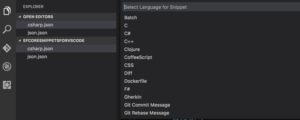
That will open a list of snippet files. Choose C# for the C# snippets and Json for the Json snippets. Paste in my snippets!

2016-10-30_11-57-25

Video of My .NET on a Mac Demo at DotNetFringe

Last week at the awesome DotNetFringe conference in Portland, Oregon, I did a 30 minute demo of building an ASP.NET Web API with Entity Framework using Visual Studio Code on my lovely MacBookPro. So it’s .NET on a mac (coding, debugging and running). It is *that* cross platform.

I also talked about some of the features of ASPNetCore and EFCore. I used other cross platform stuff like JetBrains’ DataGrip IDE for interacting with numerous databases on numerous platforms, PostgreSQL database, xunit for testing and more!

It was a boatload of fun and it’s on YouTube:

The solution I showed in the demo is in my github repository: julielerman/EFCore-ASPNetCore-WebAPI-RTM

Specifying Global TypeScript server path in Visual Studio Code in OSX

Since I’m really new to working on a mac, the instructions on the VSCode blog post (http://blogs.msdn.com/b/user_ed/archive/2016/02/09/visual-studio-code-new-features-javascript-salsa-preview.aspx) for enabling Salsa for TypeScript in VSCode was just not enough for me. This is the instruction:

You then have to tell VS Code the install location using the typescript.tsdk setting. Set typescript.tsdk to the path of thelib folder containing the tsserver.js file of the installed TypeScript module.

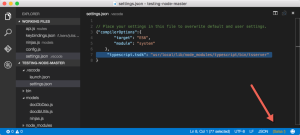
I had done a global install. And since hidden files and the usr/ folder are also a mystery to me, it took me a while to figure out that this is how to specify that in the settings.json file in VSCode.

“typescript.tsdk”: “usr/local/lib/node_modules/typescript/bin/tsserver”

I hope someone can save some time by finding this blog post.

salsa in vscode

Visual Studio 2015 Update 1: EXE Install vs Control Panel Install

tldr; my recommendation is to just do the update from control panel, not from the VS2015.1.exe

If you follow me on twitter (@julielerman) you may have caught one of my tantrum driven tweets yesterday about problems with IISExpress after I updated Visual Studio 2015 to Update 1.

I finally resolved my problems but not after a lot of whining, chocolate and avoidance measures (including a Doctor Who Season 9 episode).

I had been avoiding the update since a number of folks had been complaining about it taking hours and hours but I finally decided to bite the bullet.

I initially updated by downloading the vs2015.1.exe via VS2015 Extensions and running that. It didn’t take too long (20 minutes maybe) but in the end reported that Microsoft .NET Framework 4.6.1 RC Developer Pack had not been installed. This is a known issue. I restarted and installed that and was rewarded with “Successfully installed”.

Then I opened up an ASP.NET MVC5 (*not* the new asp.net) app I’d been working on and tried to run it and so began my problems with IISExpress. Visual Studio could not launch it. I won’t go into the many and various things I tried for the next few hours with hints from friends on twitter and many stackoverflow and blog posts. I even uninstalled and reinstalled IIS 10.0 Express a few times and tried various security/permission tweaks as well. I had offers from friends to jump on skype to help and finally took one of those up – thanks Gregor Suttie (@gsuttie) – though we still made no headway.

There was another strange problem that is noteworthy. Although Visual Studio’s Help/About window showed that I had the version # for Update 1 installed, the Extensions dialog continued to show Update 1 as an available update to Visual Studio. Something wasn’t in sync.

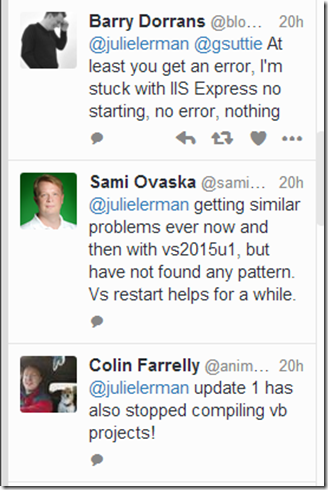
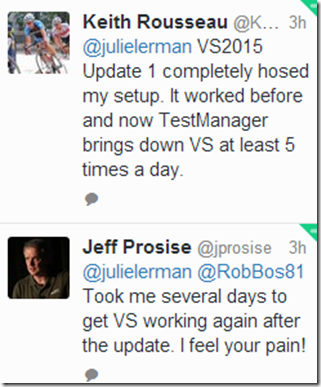
Others on twitter reported issues with Update 1, even Barry Dorrans (@blowdart) who is a security expert on the ASP.NET team and Jeff Prosise (@jprosise), a renowned .NET super duper uber expert.


image

image


image


image


image


I decided it was time to just uninstall and reinstall VS2015 – cleaner than a repair in my mind. Though I hadn’t yet determined if I would apply the Update 1 again.

I opened up Control Panel/Programs, found Visual Studio Enterprise in the list and selected it. I immediately got a notification that the setup program for Visual Studio had changed significatnly and did I want to update that before making any changes to the installation.

image

Even though my plan had been to uninstall, I decided to take that path. The update took some time … I think over 1/2 hour.

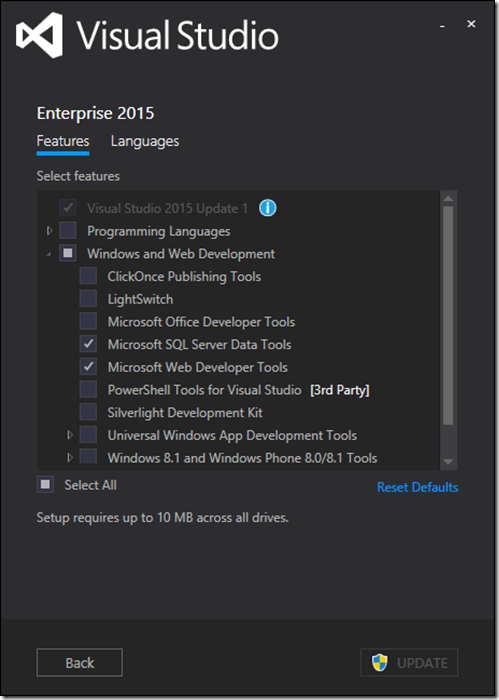
When it was done, Update 1 was one of the options listed when I chose to Modify.

image

FWIW, after performing the update, you can’t uncheck that option.

image


I selected the Update 1 and didn’t touch anything else and let ‘er rip (e.g. clicked the Update button).

It took some time to update and it was nice to see that it also brought in the latest version of the EF Designer (6.1.3) for me. “some time” ….I didn’t keep track at all …went upstairs for dinner.

When all was said and done, all of the problems I had seen via the exe install were gone. Update 1 was in place. Extensions no longer prompted me to install the update. I could debug in IISExpress again. All of my other extensions were still in place. (Update: nuget was gone, so I had to reinstall that.)

Oh and I had the new icon which many had fought so hard for:

 image

So my recommendation is to just do the update from control panel, not from the VS2015.1.exe!!

Is Visual Studio Code Bugging You For Your User Name and E-Mail Address?

“Please configure your git user name and e-mail”

Are you seeing this message when trying to push changes from Visual Studio Code to github?

It turns out that all of those times I’d been pushing/pulling from the command prompt and entering my name and email each time could have been avoided with the same configuration. But Visual Studio Code wasn’t going to let me get away with that laziness.

I finally GoogleBinged the message and learned that the configuration is something you need to do from the command prompt.

git config --global user.name yourname
git config --global user.email [email protected]