Someone Masquerading as me on Indeed and LinkedIn
I have recently been contacted by multiple people who have been getting scam virtual assistant job offers on Indeed and LinkedIn from someone using the email address julielerman101@hotmail.com. And they are attempting some standard scammy tasks like “here’s a check” (which is fake) ” please deposit it then transfer $ to [some weird place]”. Please don’t be taken in. It is not me. I don’t have accounts on any of those websites. Indeed.com has been alerted and have done something about that account. If you have been contacted by anyone like this, let me know. And I’m so sorry. 🙁
Follow My Explorations into AWS for .NET Developers
Earlier this year, a friend who is a dev advocate for .NET on AWS reached out to me to see if I had any awareness at all about the support Amazon Web Services has for .NET developers and .NET applications. My answer was a definite no. I’m an Azure fan girl and had never even thought about .NET on AWS. When he started rattling off some of what’s available, APIs, tooling and a dedicated team, I was surprised.
And curious.
So I have spent quite a bit of time sating that curiosity. I’ve written two articles that were published in Code Magazine this summer and recently published a course on Pluralsight. I still love Azure (and all my friends who work on Azure), but I’m glad to have deeper familiarity of other options. This makes me a better developer as well as a better consultant to my clients.
My focus has not been on deep DevOps or comparisons to Azure. I just wanted to see how things work and try it out. And I was definitely impressed.
I did all of the work in Visual Studio on my Windows machine because there is a very feature rich extension called AWS Toolkit for Visual Studio. There are also extension for VS Code, JetBrains’ Rider and other IDEs (not just for .NET). The ones for VS Code and Rider are more focused on serverless apps so they don’t have all of the features of the one for Visual Studio.
Since I’ve already created so much content, I’m not going to reiterate it all here but I wanted to be sure you are aware of the articles and the course and…the fact that there is such a thing as .NET on AWS. Whether, like me, you are curious, or like others, you are a .NET developer who has been tasked to learn about using AWS, I hope you find them interesting. Here’s what I’ve created thus far:
Discovering AWS for .NET Developers
Article, May/June 2020 Code Magazine
This is about first foray. Creating an account, installing the toolkit into Visual Studio, creating a SQL Server database (on AWS), pointing a .NET Core 3.1 App with EF Core to use that database, then (using the AWS toolkit), publishing the application to AWS.
Transform Your ASP.NET Core API into AWS Lambda Functions
Article. July/August 2020 Code Magazine
This is the next foray. I took the application from the first article, transformed it into an AWS serverless application (mostly by adding a few files provided by a project template), then publishing it to AWS. In the end, AWS creates a Lambda serverless function in front of the API, which means you get the benefit of the billing that is only based on calls coming through function. That compares to the cost of having the application running and waiting for requests 24/7.
Fundamentals of Building .NET Applications on AWS
Pluralsight course, 2.5 hours. Published Aug 7, 2020
The course leans on what I learned through the articles but also allowed me to spend more time explaining and teaching additional information. In the course, I walk through creating an account, installing the toolkit, creating the SQL Server database, publishing the .NET Core/EF Core app and publishing the serverless app. There is an additional lesson which is about publishing the application as docker containers, fully managed by AWS via a service called Fargate. There’s a lot more detail than the articles and I’m really walking you through step by step from start to end for each task.
I hope you’ll find the articles and course helpful and interesting, especially, if like me, you had no idea all of this support for .NET devs exist from AWS.
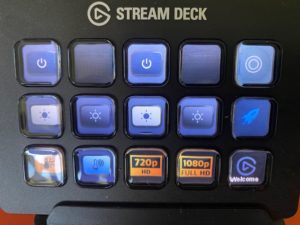
Resize Windows’ Screen Resolution with a Touch of a Stream Deck Button
I have a lovely pair wide screen monitors with 1080p resolution. However, when recording software training courses for Pluralsight, we are asked to use a resolution of 1280×720 so that text and code are legible across a variety of devices and sizes.
Therefore, when recording a course, which may take me many many weeks, I tend to leave one of my monitors at 1280×720. But I’m constantly doing other things on that monitor such as email or writing and that resolution is discomforting.
There is no easy way to change the resolution other than going into system settings. But I now have a super easy way to change that monitor’s resolution back and forth.
Like many of us who are now creating content at home (although I am not streaming on twitch like many of my friends) I recently added an Elgato Stream Deck controller to my toolkit, along with some key lights, too! I use the stream deck to control the lights while recording video that requires that I be in it.
Step 1: Find a command line tool for affecting screen resolution.
There are some apps and there are a few CLI tools. After asking around on Twitter, I learned about Display Changer 2, used by two very trusted nerds (and friends):
I took @DamianEdwards‘s word for it. 🙂
— Glenn F. Henriksen (@henriksen) May 18, 2020
However, there are TWO versions of Display Changer and DC2 is the programmable one. So not knowing there was a simpler version, I got stuck on a path that was way more complicated than I needed. I learned how to create xml configuration files for various display settings, then create a PowerShell script to execute DC2 against those config files. But Stream Deck can’t run PowerShell files, so then I had to create a batch file to run the PS1 file. It was madness but I was determined and got it all working. And then blogged the very complicated path. Oy vey!
Then back to my brainy pal who said…well, y’know….:
From Stream Deck I just call
— Glenn F. Henriksen (@henriksen) May 23, 2020
“C:\Program Files (x86)\12noon Display Changer\dc64.exe” -width=1920 -height=1080
to set my main screen to the resolution I want.
Now this is my pal from whom I learned YET A BETTER WAY to load utensils into a dishwasher that I am now obsessed with (the dishwasher trick, that is. I do like Glenn, but no, I’m not obsessed with him)! So I always trust him, but I looked at that and thought “DC2 doesn’t have these switches and what is DC64?”.
I went back to 12noon’s website and realized that the “Display Changer” is different than “Display Changer II” and is a simpler tool to work with. Even though I felt like such a dope for getting stuck on the complicated path, I was happy for the MUCH EASIER way! So if you haven’t ever configured a Stream Deck button, let’s finish this up with Glenn’s easy street way.
Step 2: Identify the Monitor
I’d recommend practicing the command at the command line before just shoving it into Stream Deck. Also, since I was aiming for my secondary monitor, I needed to use the dccmd -listmonitorscommand to find out how to address that monitor. Turns out it’s "\\.\DISPLAY2"
So the command to change that monitor’s resolution to 1280×720 is:
"C:\Program Files (x86)\12noon Display Changer\dc.exe" -monitor="\\.\DISPLAY2" -width=1280 -height=720
Step 3: Configure Stream Deck buttons to run the batch files
In the Stream Deck app, drag the System/Open option onto the button you want to configure for 720p.
In the settings, leave Title blank.
In the App/File setting, paste in your command:
"C:\Program Files (x86)\12noon Display Changer\dc.exe" -monitor="\\.\DISPLAY2" -width=1280 -height=720
In the icon selector, you can choose Create New Icon to design then download an icon for your button.
Setup another button to change the monitor back to your default resolution. Mine is 1080p.
"C:\Program Files (x86)\12noon Display Changer\dc.exe" -monitor="\\.\DISPLAY2" -width=1920-height=1080
Originally these were the icons I crated for my buttons. They are good enough for me and bright colors.
 |
 |
But Glenn was unimpressed and created some new ones and sent them to me. I’m sure he’ll be happy for me to share them.
 |
 |
Here’s the Stream Deck with it’s new buttons. The setup works like a charm!
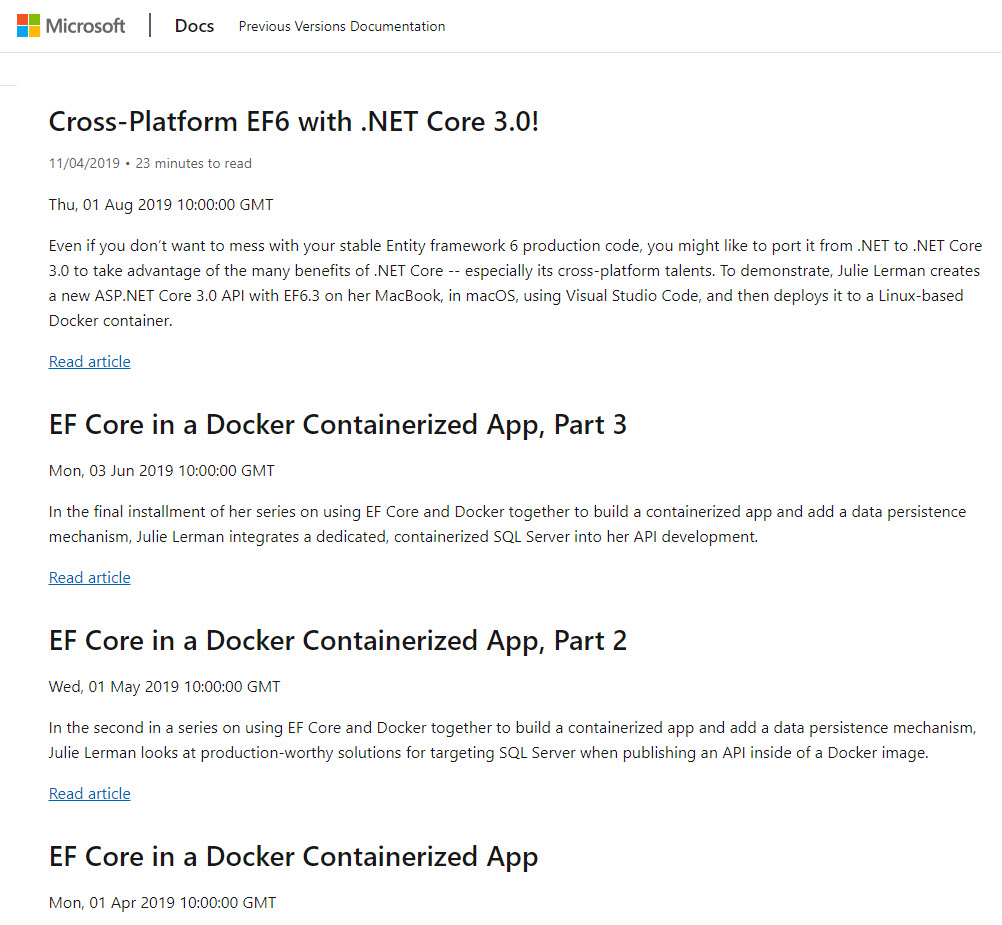
MSDN Mag Data Points Column Archives in Microsoft Docs
With MSDN Magazine shutting down, all of the content has been archived on the Microsoft docs site.
You can get to a listing of magazines by issue at https://docs.microsoft.com/en-us/archive/msdn-magazine/msdn-magazine-issues
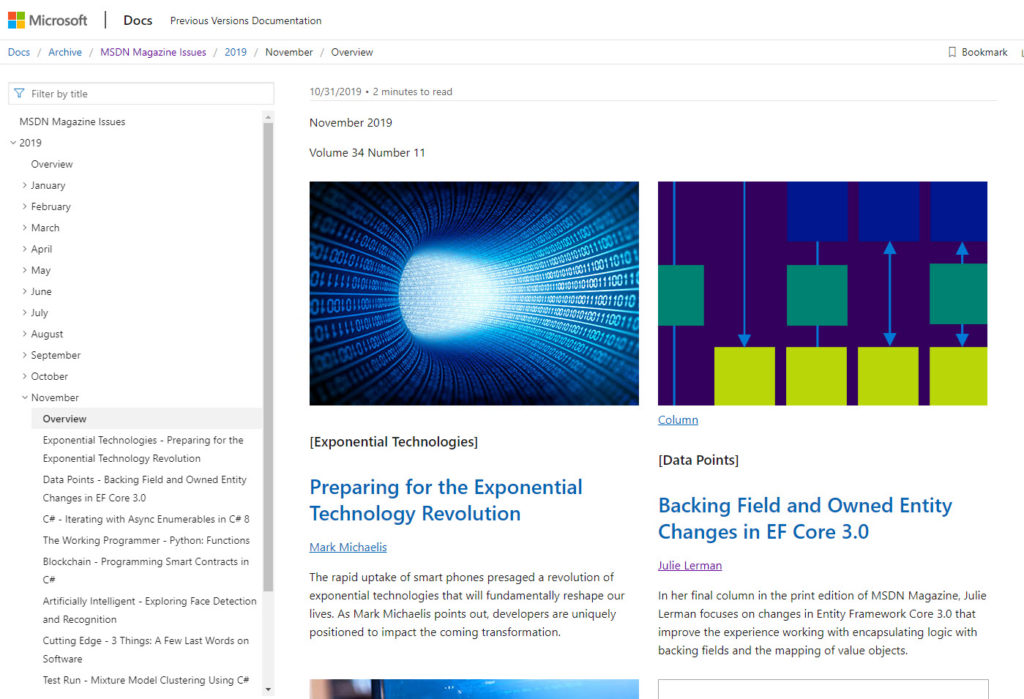
And if you are looking specifically for my Data Points column archives, here is a link to the list of those articles:
https://docs.microsoft.com/en-us%5Carchive%5Cmsdn-magazine%5Cauthors%5CJulie_Lerman
Pluralsight is totally free for the month of April
While many of you who read my blog are already Pluralsight subscribers with work or personal subscriptions, there are so many who do not have access. So Pluralsight is opening up the entire library of over 7,000 courses for people to watch while stuck at home. And you do not need to use a credit card to sign up.*
So whether you want to watch one my my courses such as
- EF Core Getting Started (completely new for EF Core 3.1)
- The recently updated Getting Started with EF6
- The updated and soon to be republished EF 6 Ninja Edition (focus on advanced features)
- Automated Testing for Fraidy Cats Like Me (a getting started course on testing aimed at new and experienced devs)
- EF in the Enterprise (this is for EF6 …will be updated to EF Core but most of the architectural concepts are the same).
- Domain-Driven Design Fundamentals, co-authored with Steve Smith and still one our most popular courses!
Or any of the other 7,000+ courses from some of the most knowledgeable devs who happen to be great at teaching ….
There is also a free plan for business accounts.
Business Free April Details: “To support your team’s skill development during these new challenges, for a limited time we’ve extended our free team trial from 14 days to 30 days.”
*The fine print: Free April is open to anyone who is not a current, active subscriber. New free accounts and reactivated accounts opened through April 30, 2020 will have access to Pluralsight’s library of video courses through April. Payment information will not be required for new free accounts opened through April 30, 2020. New free accounts opened after May 1, 2020, will only have access to a portion of Pluralsight’s library and will require payment information.
November Conferences: BuildStuff in Lithuania and GOTO in Copenhagen
I have one last conference trip coming up in 2019 which is a two-fer.
First, I’ll be at BuildStuff in Vilnius Lithuania Nov 13-17. I’m excited to be giving a keynote, “Living with Your Legacy”. If you are planning to attend but haven’t registered yet, you can use my last name “LERMAN” as a discount code. Register here. Twitter hashtag is #BUILDSTUFFLT.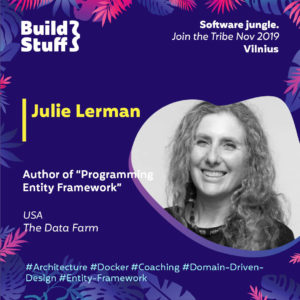
From Lithuania, I’ll then be traveling to Copenhagen for GOTO Copenhagen. (Nov 18-20). This conference also has a discount code, “speakerfriend”. The twitter hashtag for this conference is #gotocph.
Resources from BASTA! “EF Core in Containerized ASP.NET Core APIs” session
I’ve uploaded the slides (on slideshare) and source code (on GitHub) from this session.
Thanks to those who attended and for your interest! Hope you “get” Docker now! 🙂
Resources from BASTA! “Living with Your Legacy” Keynote
I made reference to various books, podcasts, great minds and more in the keynote at BASTA! Conference. Here are links for the curious:
Michael Feathers‘ Book “Working Effectively with Legacy Code”, Prentice Hall, 2004
Eric Evans‘ book, Domain-Driven Design, Addison-Wesley, 2003
Michael Feathers’ blog post Is Technical Debt Just a Metaphor?
Legacy Code Rocks podcast
Corgi Bytes (Andrea Goulet & M. Scott Ford)
Nick Tune DDD Hidden Lessons talk from Craft Conference
Accelerate, The Science of Devops: 2018 book, 2019 update (free PDF from Google) . Nicole Ferguson, PhD, Jez Humble, Gene Kim
Sad News: MSDN Mag & (Data Points) Coming to an End
From MSDN Mag
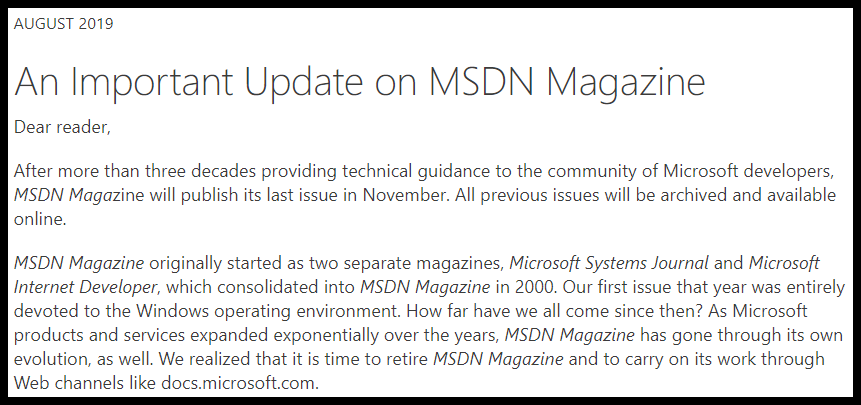
Perhaps I live in a world of rose-colored glasses but this was a surprise to me when Michael Desmond, the Editor-in-Chief, called to let me know in advance of the public announcement.
I’ve loved the magazine long before I was blessed with the opportunity to write for it. But as a columnist for the past 10 years, I’m somewhat heartbroken. The Data Points column (I hope this link will continue to work) that I inherited from John Papa in early 2010 has been a font of inspiration for me. I’ve used it as an excuse to dig into data related technologies that I was curious about.
As long as there was some data angle, the topic was fair game. This allowed me to take my first successful adventure even into Git (2014: Git, It’s Just Data), serverless computing (2018: Creating Azure Functions to Interact with Cosmos DB) and even front end development (2015: Revisiting JavaScript Data Binding — Now with Aurelia). And on the true data front, I had a great reason to start learning about document databases (2011: What the Heck Are Document Databases?) which led to a lot of articles involving Azure Cosmos DB. Thanks to SQL Server for Linux, I finally had the courage to dive into Docker and have gotten to write a slew of articles on different aspects of that.
Many of you have also followed my journey as I gained more and more expertise in Domain Driven Design and continually checked in to see how well EF and then EF Core helped as a mapper between DDD-focus designed classes and a relational database. The first article I wrote connecting the two was in 2013: Shrink EF Models with DDD Bounded Contexts.
And of course there have been a few articles on or using Entity Framework! Over 50 of them!
In all, if you count the final two articles I have in the works, I’ve written (if I’m counting correctly) 82 columns. And there were a few articles in there as well that weren’t for the column such as one on Visual Studio Live Share and Azure Data Studio for special issues.
But what I will never forget is the very first article I wrote for the magazine. It was a gift of an opportunity thanks to the amazing Sara Spalding who was at the time in charge of the entire MSDN operation (at an impressively young age). That was the April 2005 issue and I wrote an article on ADO.NET 2.0. I still have the magazine!
People have suggested that with the demise of the magazine, I should just continue the column on my blog. But admittedly, in addition to the incredible opportunity to share my learnings with an interested audience, having deadlines, a copy editor, tech reviewers and equally important: a paycheck, really drove me to produce this column so diligently for almost 10 years. But I’ll never stop researching and sharing! That’s for sure.
With the evolution of MSDN docs, an entire team to create those and the still growing developer advocacy teams at Microsoft, you will certainly continue to get great content from them as MSDN Magazine yields to this fantastic resource.